
Using a traditional router can be tricky when you live in a multi-floor home with basements and attics. Traditional routers often struggle to maintain a strong signal through floors, causing connection issues and buffering during streams or calls. You’ll see a drop in the Wi-Fi signal when you switch rooms that even flagship Android phones can’t handle. Google has a solution with its Nest routers. Here’s how to set up your Nest router to avoid problems when using your basement or attic as a home office or entertainment zone.
What is a Nest router?
Google’s Nest router, a member of the Google Nest product family, improves the internet by replacing conventional routers with a mesh network system. This system has a main router and additional mini-routers distributed throughout the home to ensure strong, uniform Wi-Fi coverage.
Beyond providing reliable internet, Nest Wifi doubles as a speaker with Google Assistant, capable of music playback, device control, and seamlessly integrating into your smart home ecosystem.

Every music service supported on Google Assistant and Google Nest speakers
Use Google Assistant to play your favorite tunes
First thing first, prepare for your Google Nest router setup
Before jumping into the setup process for a smooth installation, have these key items. Here’s a checklist:
- A Google Nest Wifi router. Additional Wi-Fi devices, such as a Nest Wifi point, are optional but can expand coverage.
- A Google account for accessing and managing your network through the Google Home app.
- An Android phone or tablet with Android 9.0 or later or an iPhone or iPad with iOS 14.0 or later.
- The latest version of the Google Home app, which is available on the Google Play Store for Android or the App Store for iOS.
- Initial Home Setup in Google Home App.
- An active internet service.
- A modem.
Buy your mesh network devices, including routers and extenders, in the country where you use them to avoid compatibility issues. Wireless regulations are not uniform worldwide. Using devices in a country different from where they were purchased can lead to operational issues.
How to set up a new home on Google Home
Add a home to organize and manage your devices in the Google Home app. After that, invite home members to share control of the house and its devices.
Here’s how to do so:
- Open the Google Home app.
- Choose your Google account and sign in.
- If prompted, turn on Bluetooth and Wi-Fi.
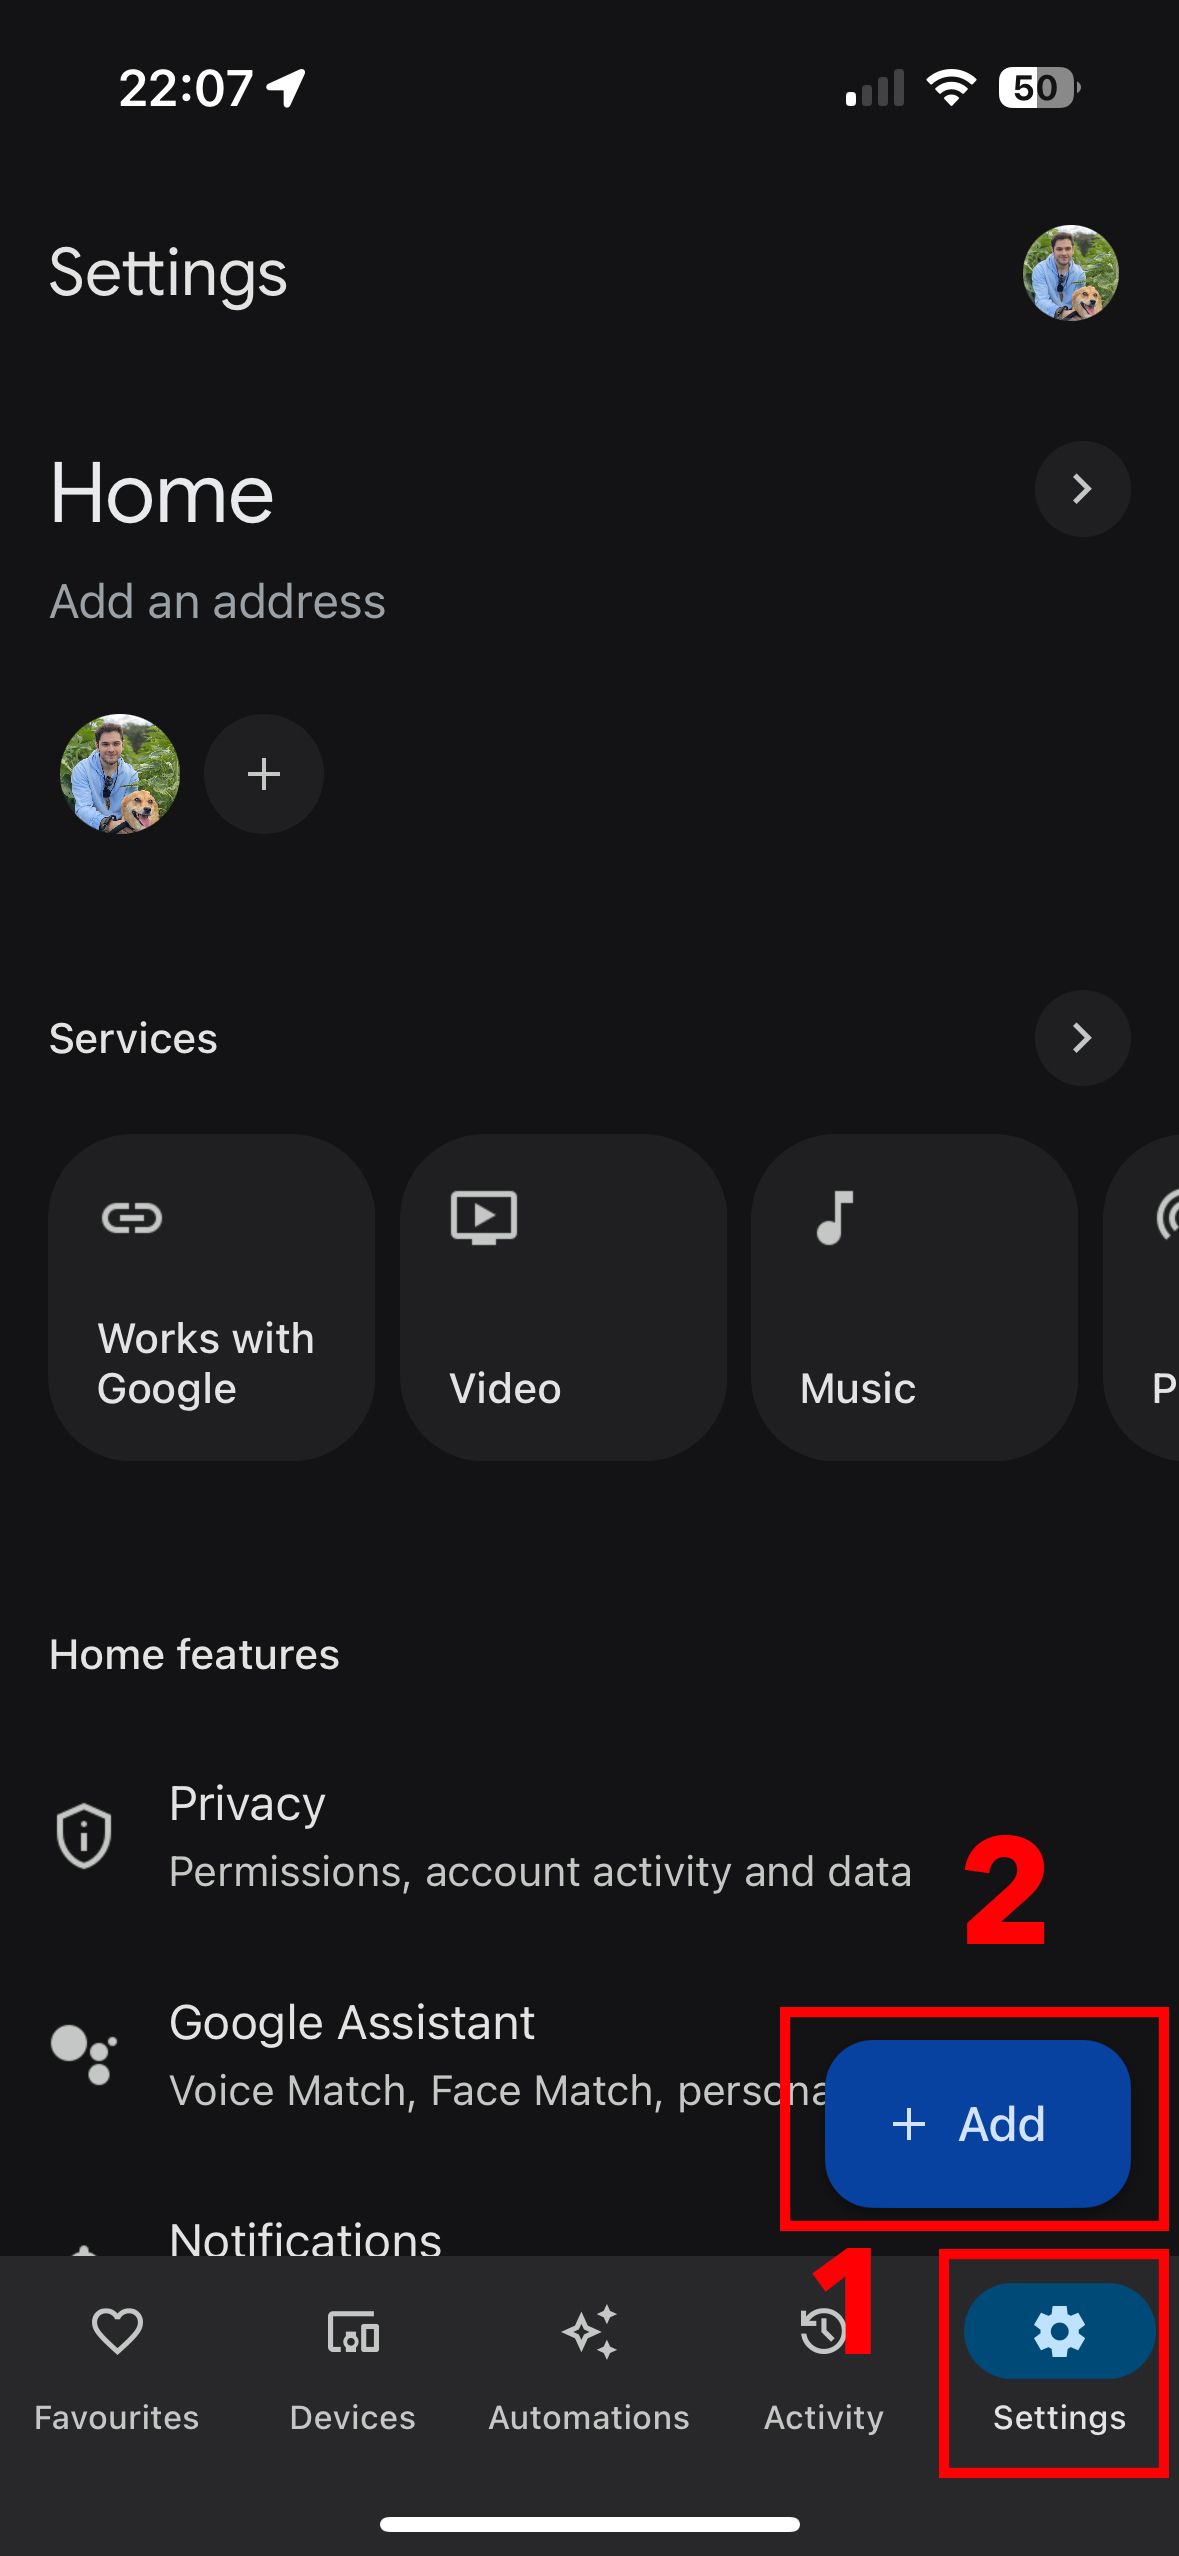
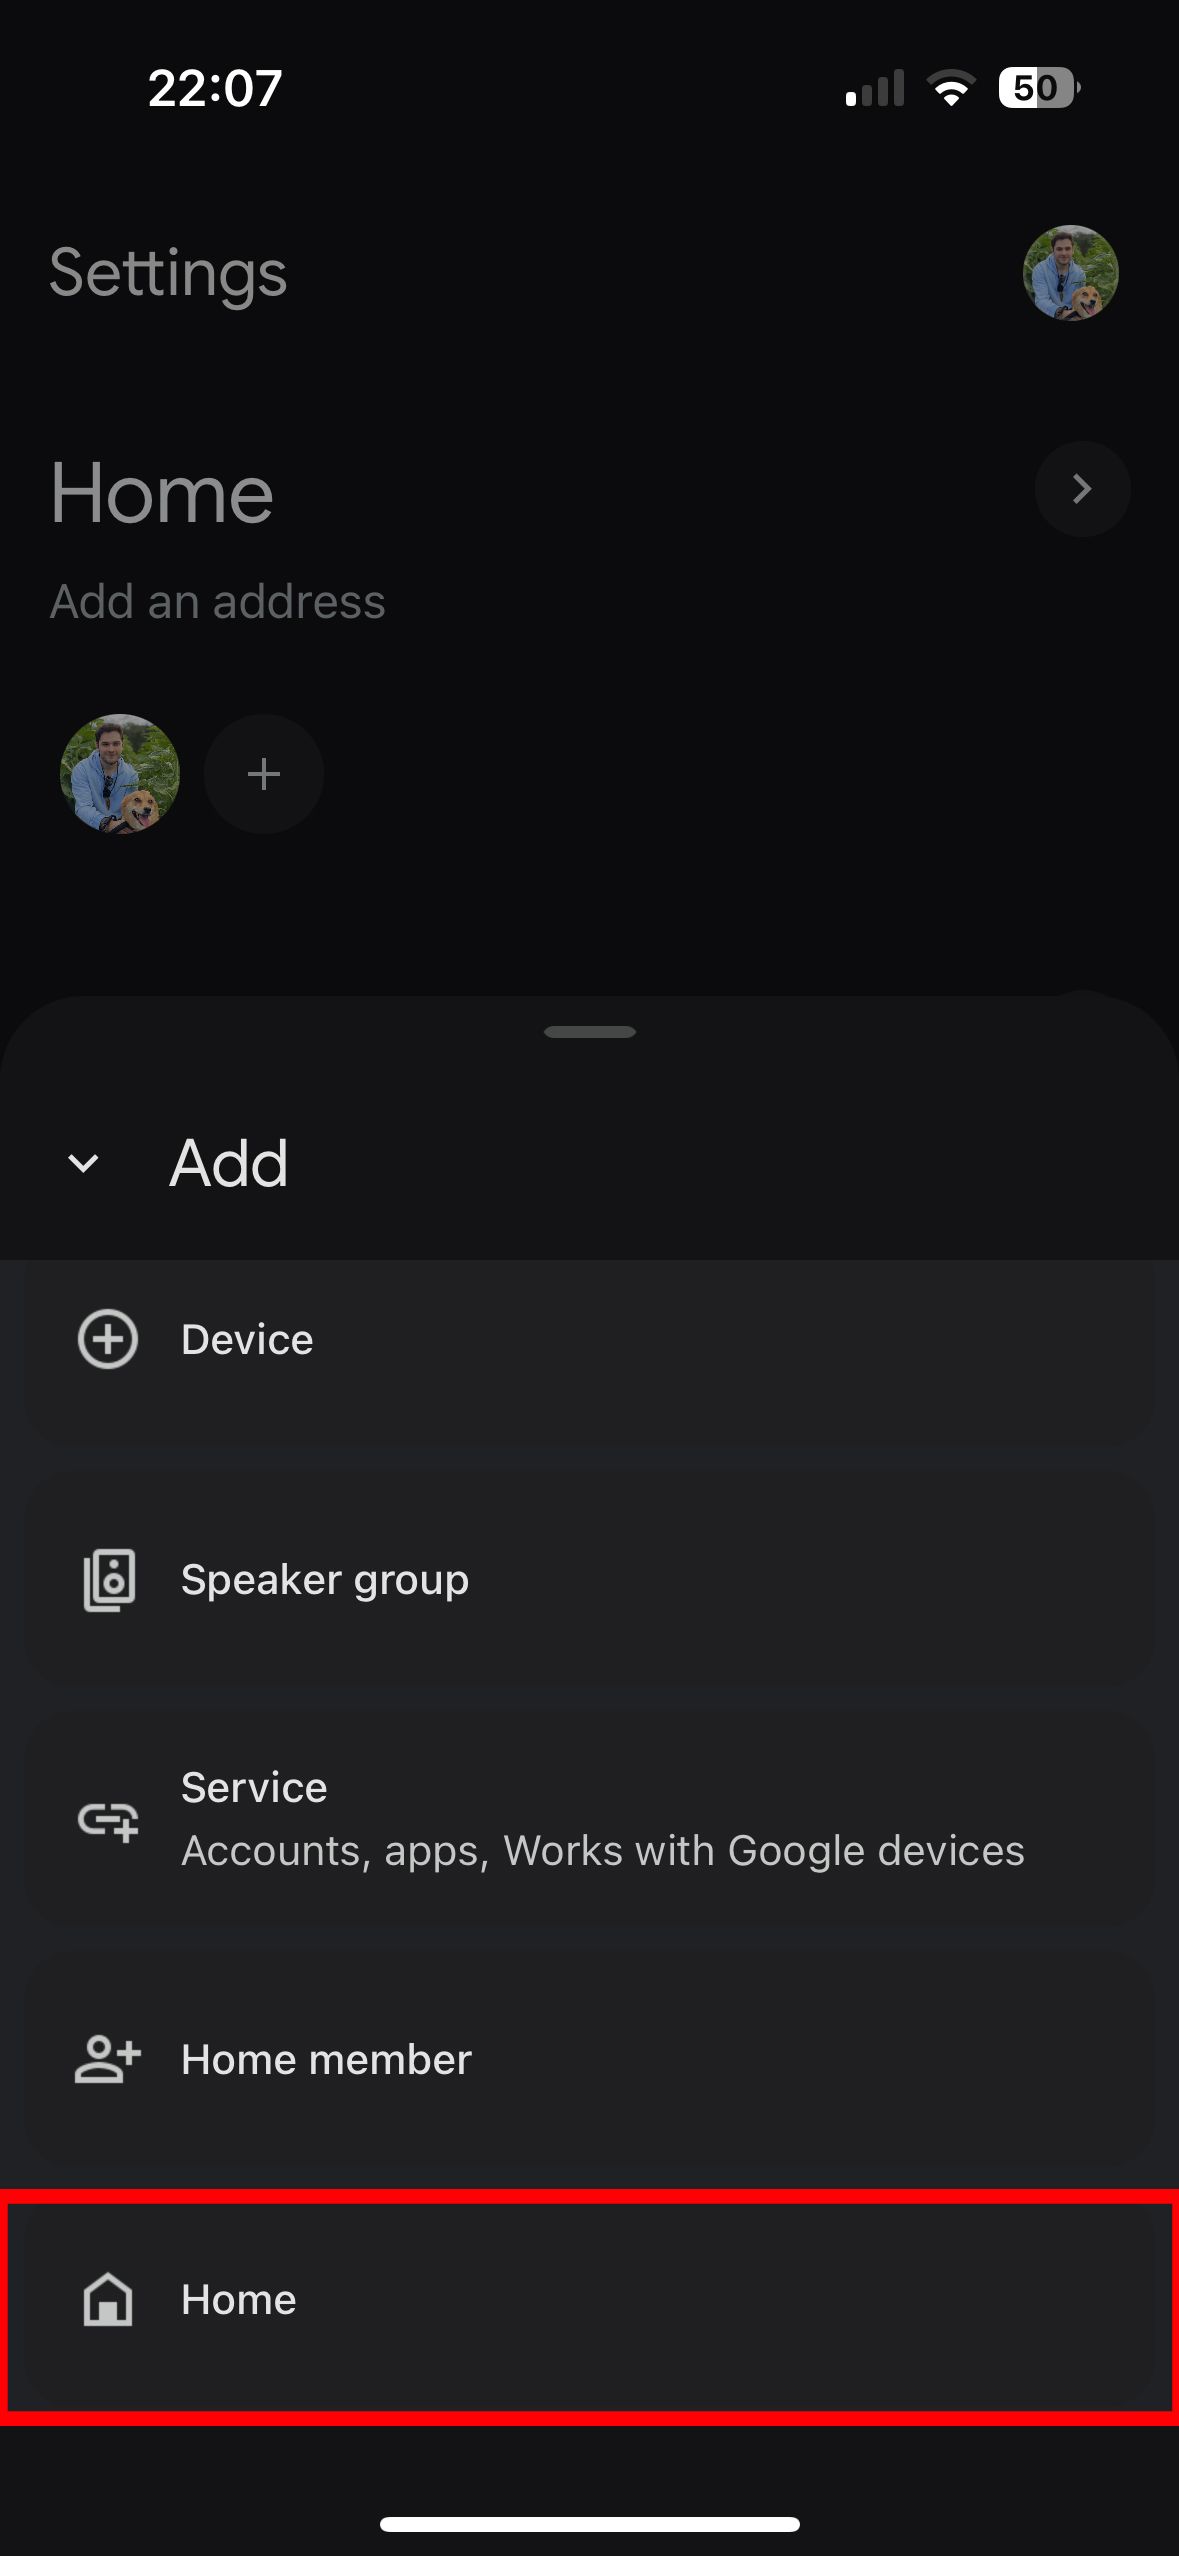
- Go to Settings, tap Add, then select Home.
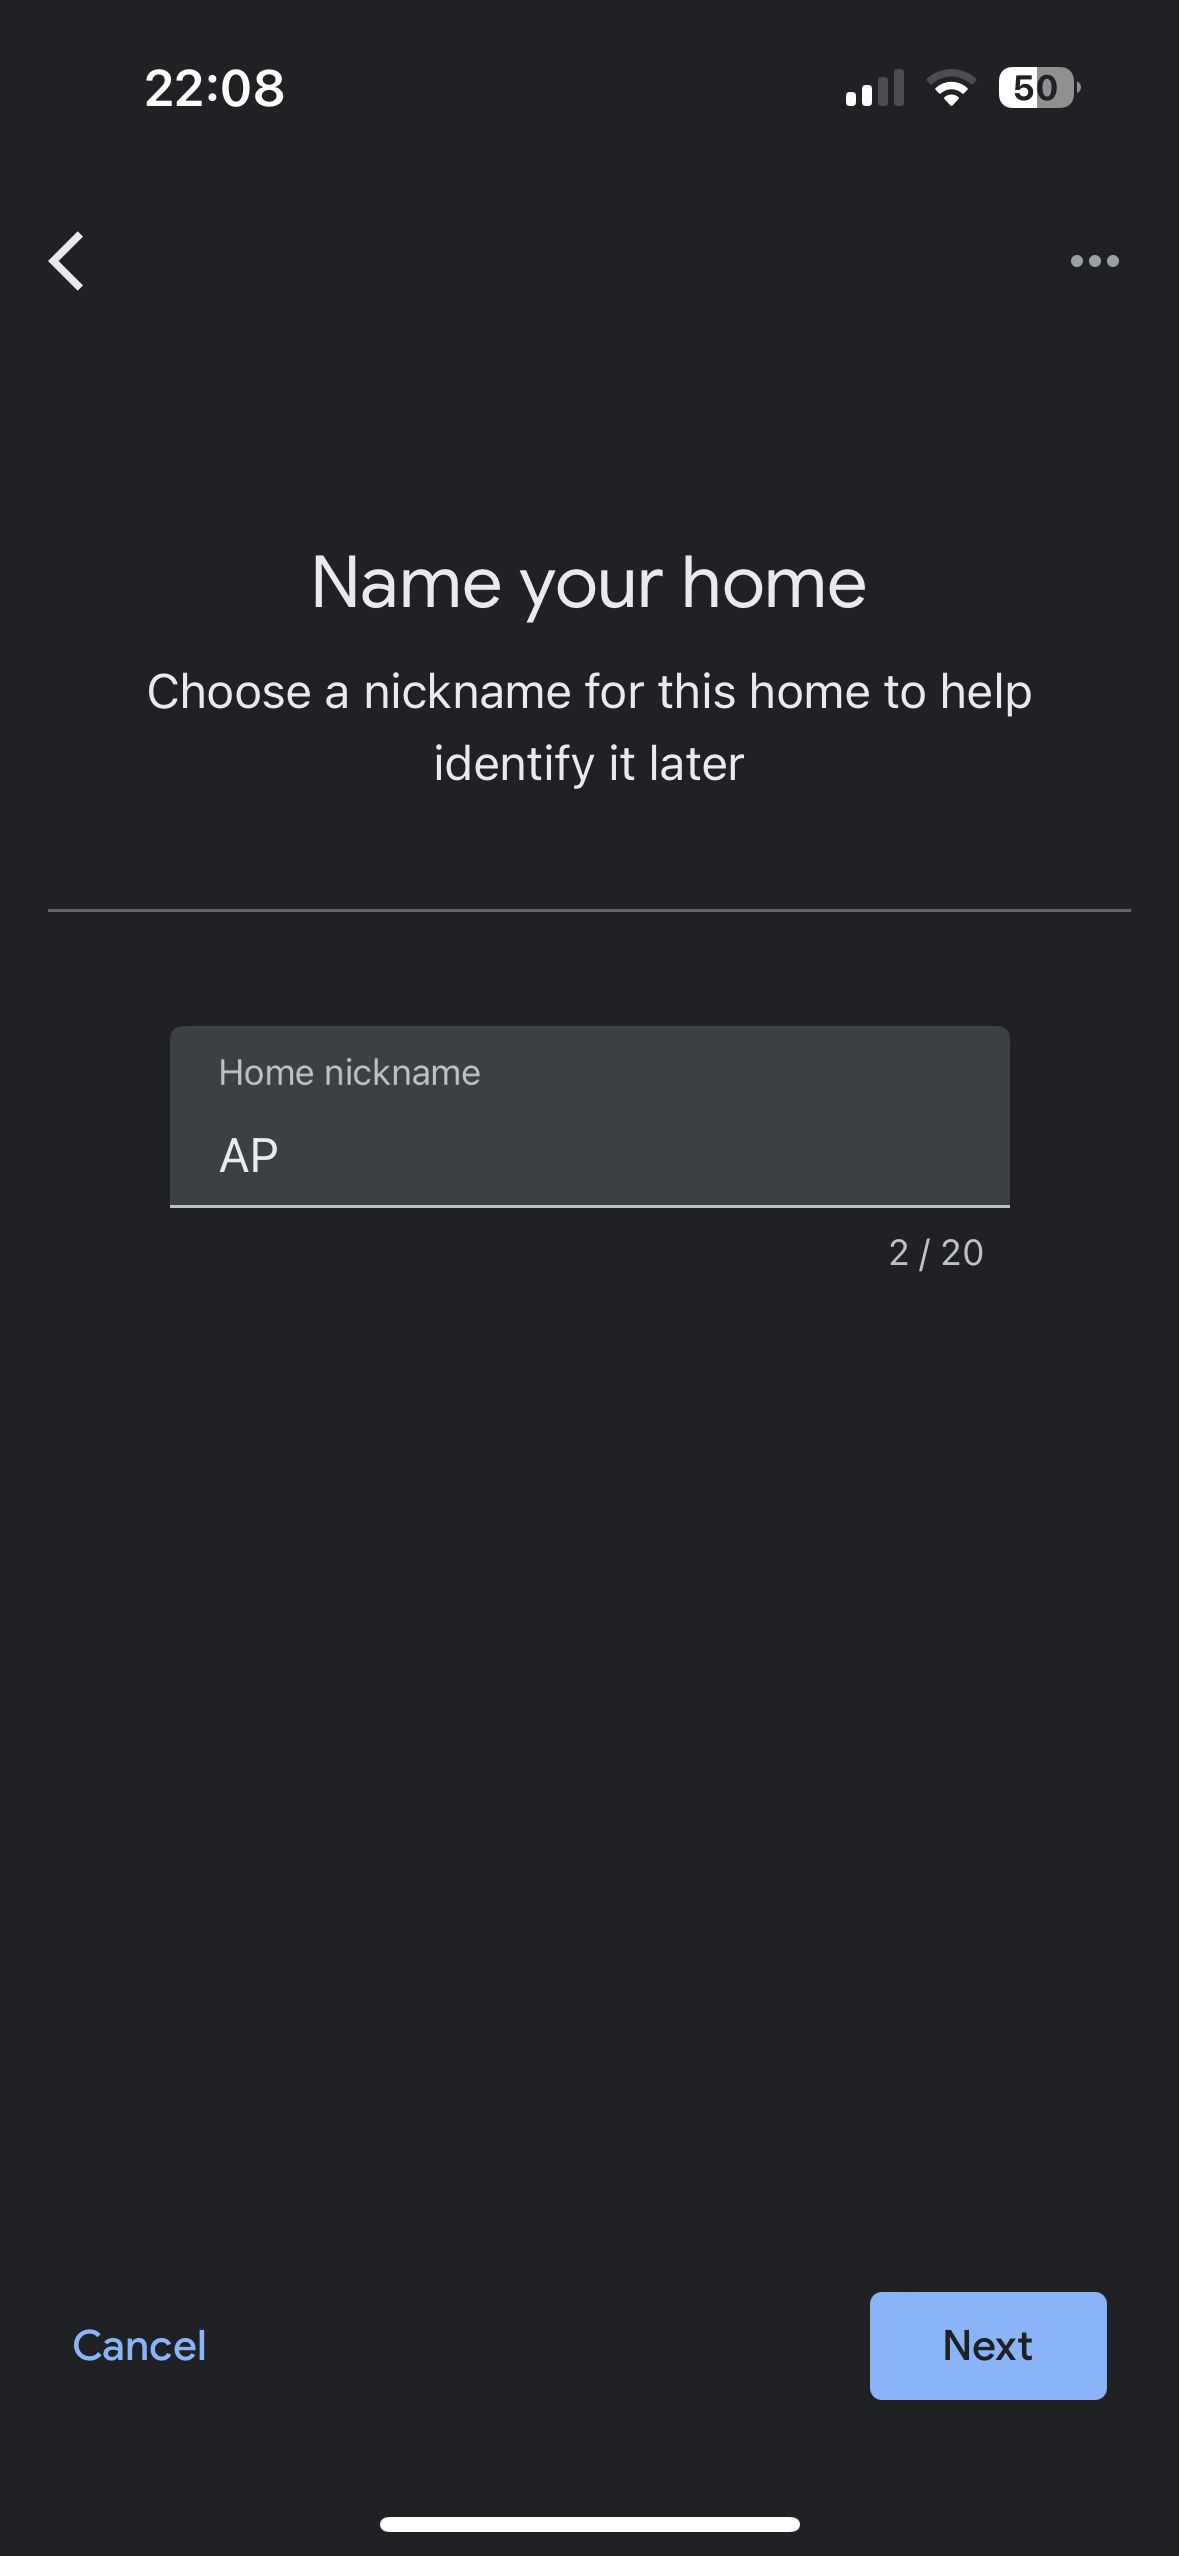
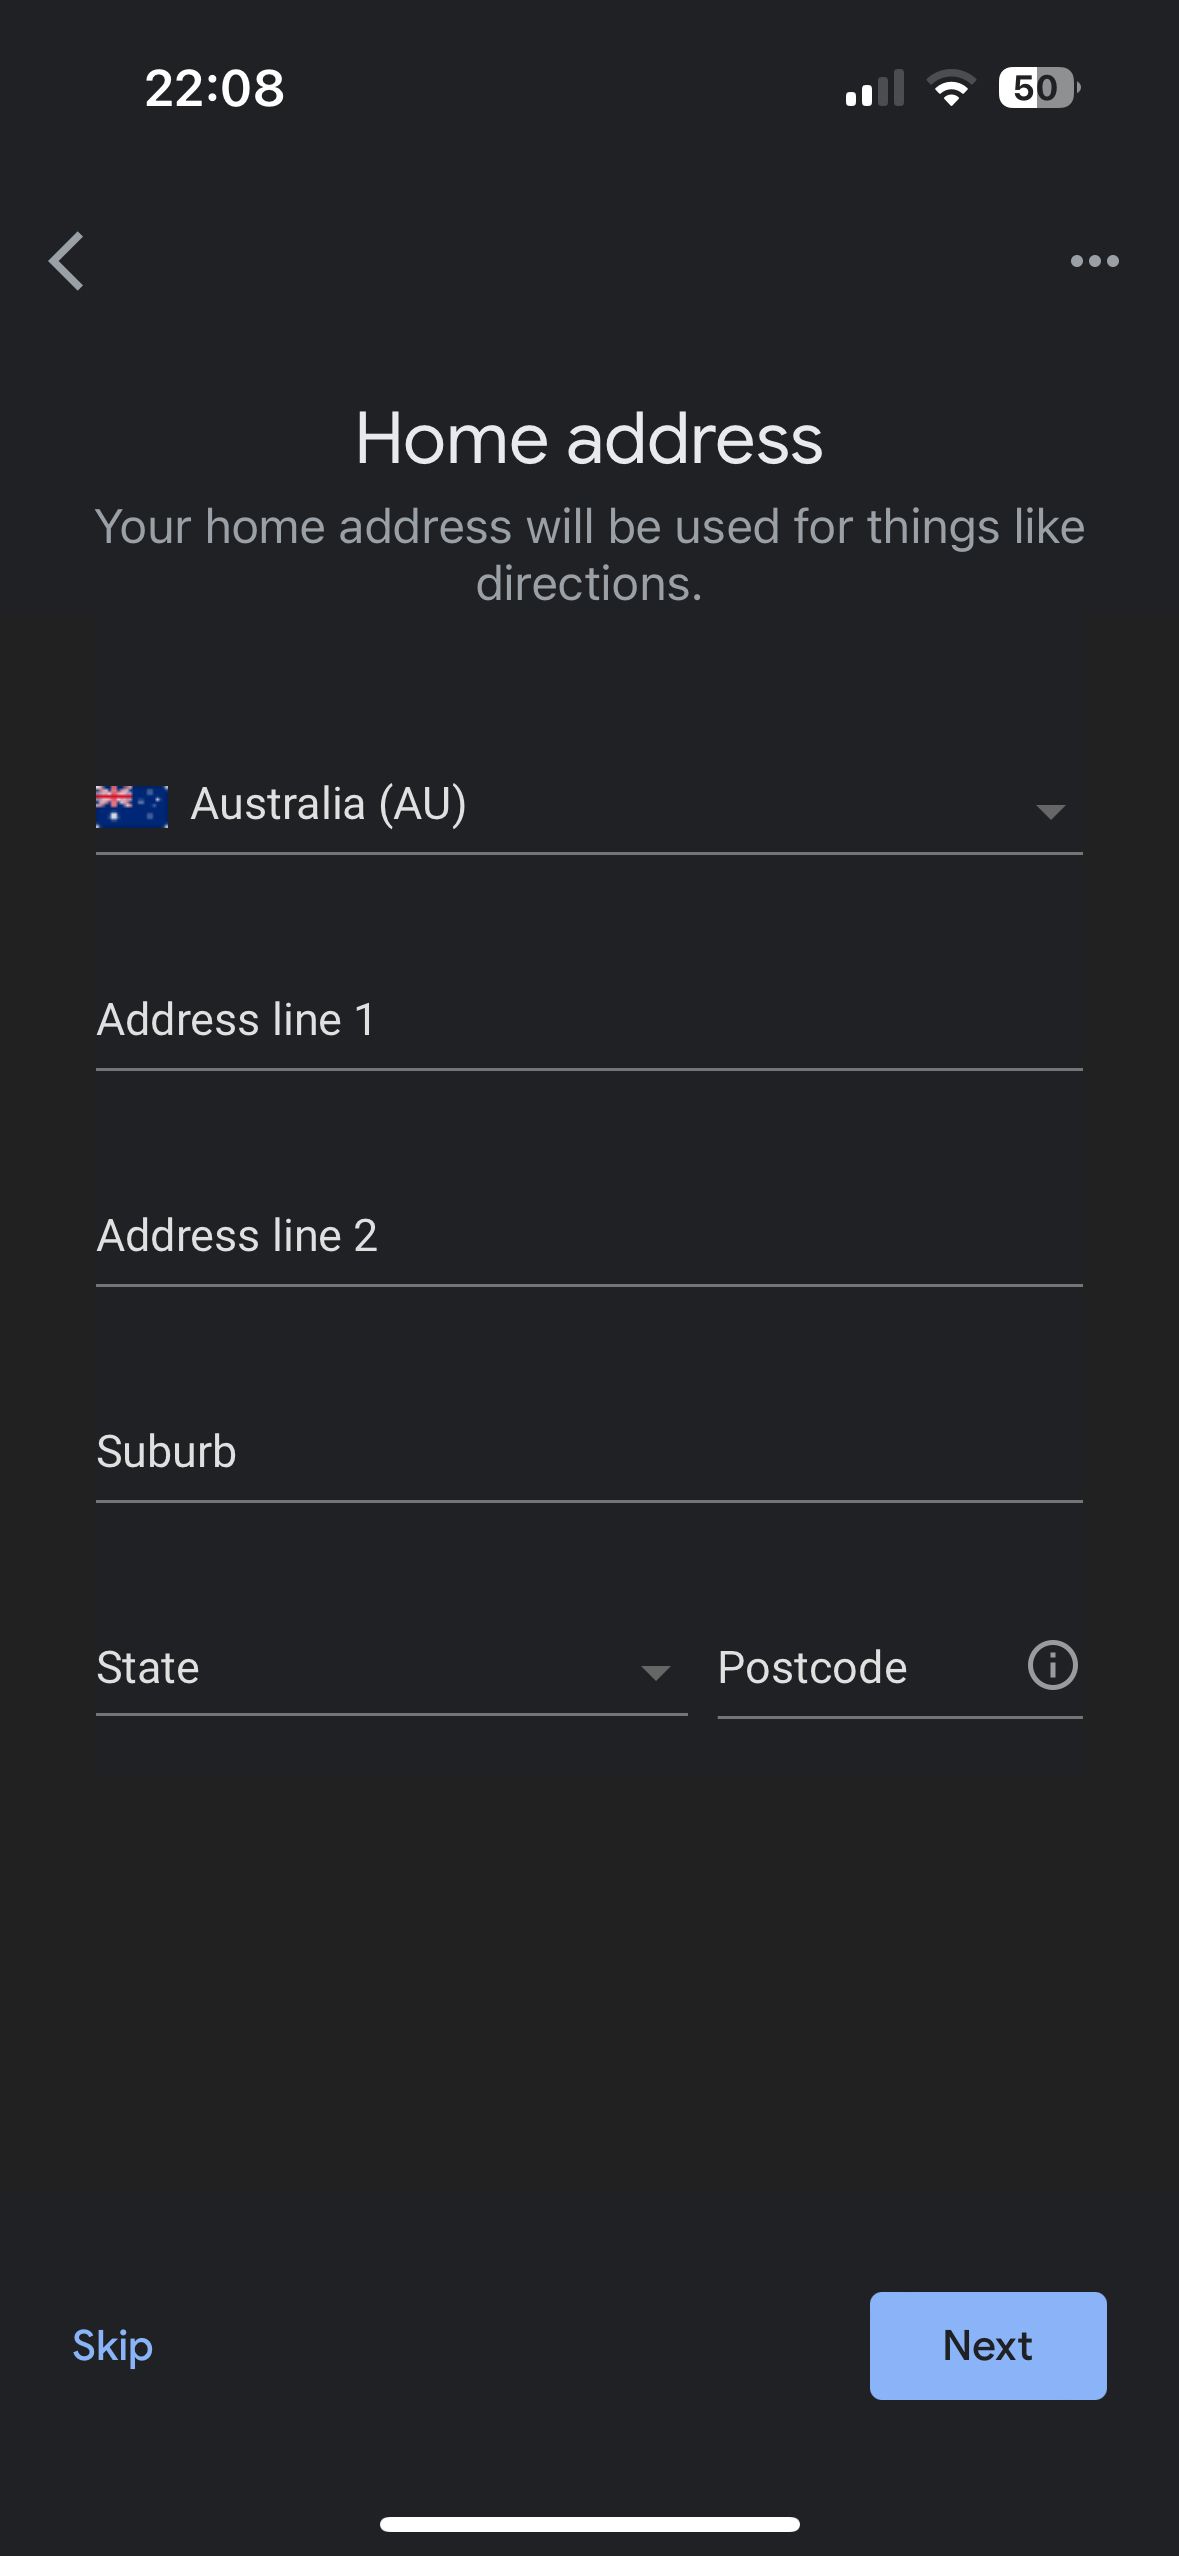
- Give your house a nickname and enter your address.


Google Home: Everything you need to know about the smart home platform
Google Home is essential for your smart home setup and makes your day a little simpler
How to set up a Google Nest router
To set up the Google Nest router in your home, follow these instructions:
- Insert the Ethernet cable into the WAN port of your Nest Wifi router and connect it to your modem.
- Plug the router into a power outlet. Wait for the light to pulse white, signaling it’s ready for setup.
- Open the Google Home app on your phone or tablet.
- Go to Devices, tap Add, then select Google Nest or partner device.
- Pick a home for your router in the Google Home app.
- Choose your Nest Wifi router from the list.
- Scan the QR code at the bottom of the router. If scanning fails, select Continue without scanning and input the setup key found on the device.
- Set a unique name and secure password for your Wi-Fi network.
- Wait as the router establishes your Wi-Fi network. A solid white light indicates completion.
Optimal placement of Google Nest router
A Google Nest Wifi router and extension points must be strategically positioned throughout your home to ensure seamless Wi-Fi connectivity. Your router must be connected to a modem, limiting its placement based on the modem’s location and the lengths of available Ethernet and power cables. Optimally, the router should be positioned in a clear, elevated spot, preferably at eye level, like on a shelf or atop a TV stand, to improve signal coverage.
Optimal placement of Google Nest points
To optimize your home’s Wi-Fi coverage with Google Nest Wifi points, assess your home’s layout to determine the number of points required.
|
Devices |
Coverage |
|
Nest Wifi router (standalone) |
1–2 bedroom homes |
|
Nest Wifi router + one point |
2–3 bedroom homes |
|
Nest Wifi router + two points |
3+ bedroom homes |
|
Nest Wifi router + three points |
Additional coverage for 1–2 rooms |
These points are designed to work cohesively and offer optimal coverage when placed within two rooms of one another. If you’re addressing a weak signal area, position a point not at the far end but somewhat closer to ensure effective signal distribution.
Ideally, points should have a clear line of sight towards each other. Adjust their positions to avoid obstacles such as walls and large objects.
Finalize your setup by performing a mesh test through the Google Home app. Choose Favorites > Wi-Fi > Points > Test mesh to measure your network’s performance.
Enjoy the reliable connection and smart home controls
Google’s Home app is your centralized command center for everything smart in your home. Whether you’re at work or visiting a friend’s house, you can control your home’s devices, from cameras and dishwashers to doorbells and the temperature, with a few taps on your phone. Indulge in your superior network quality. Kick back with some engaging games on your Android phone, or get to know Google Assistant’s features.
Source link