The top Android smartwatches automatically set themselves to the correct time after you pair one to your Android phone. However, if you don’t have access to the internet while at home or traveling, you must adjust it manually to compensate for switching time zones or daylight savings. Time is crucial to numerous elements of your smartwatch. For example, it must be set correctly to ensure notifications, fitness tracking apps, and health updates sync seamlessly. This guide shows you how to change the time on your Android smartwatch.
Make sure your phone and watch are paired
First, check that you have paired your smartwatch with your phone. Most of the time, it automatically adopts the correct settings from your phone. It’s all about that seamless connection between your gadgets. Changing the time on your phone updates your smartwatch automatically.
How to use your Wear OS smartwatch with Google Maps
You can keep your phone in your pocket when using Google Maps on your smartwatch
Setting the time on your Android smartwatch might seem like a small detail, but many apps need it to work smoothly. Your calendars, appointments, and schedules rely on the correct date and time.
How to change the time on your smartwatch without using the app
This article uses the
Google Pixel Watch 2
, but you can use this guide for all Android smartwatches. However, manufacturers organize the menus on their smartwatches differently, so watch for these changes.
Changing the time and date on your smartwatch is a breeze, especially when you do it from your smartwatch settings. Follow these steps to ensure your device is always in sync with your schedule and activities:
- Press the crown button to go to your smartwatch’s home screen.
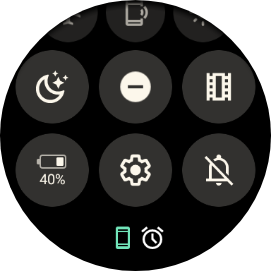
- Swipe down from the top of the screen to open the Quick Settings screen.
- Tap the Settings button (cog icon). If you can’t find it, swipe left.
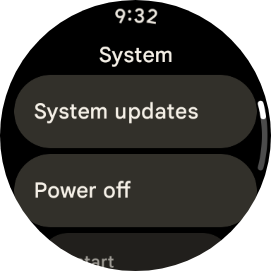
- Scroll down and tap System.
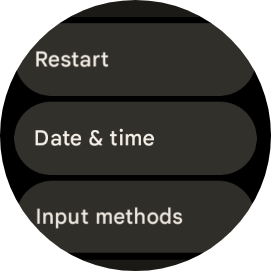
- Tap Date and time.
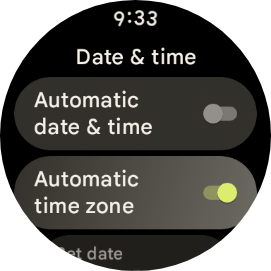
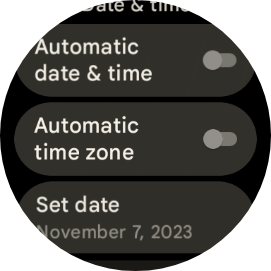
- To change the time manually, turn off Automatic date and time.
- Scroll down and tap Set time.
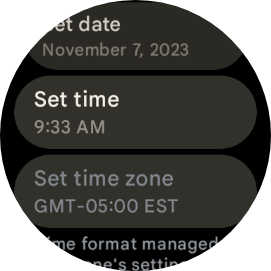
- Change the date if needed and then tap Set date.
Set the time zone on your Android smartwatch
Adjusting the time zone on your Android smartwatch is essential, especially if you travel frequently or have friends and family in different parts of the world. Changing your watch’s time zone ensures notifications, appointments, and reminders sync with the local time.
Most smartwatches offer a straightforward way to change the time zone from the watch settings. It’s as easy as tapping a few buttons to find the correct city or region.
- Press the crown button to go to your smartwatch’s home screen.
- Swipe down from the top of the screen to open the Quick Settings screen.
- Tap the Settings button (cog icon). If you can’t find it, swipe left.
- Scroll down and tap System.
- Scroll down and tap Date and time.
- Turn off the Automatic time zone switch.
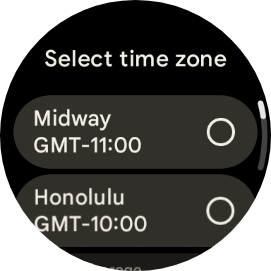
- Scroll down, and tap Set time zone.
- Select your time zone from the list.
You might need to turn to your smartwatch app on your Android phone for certain models. After it’s paired, the app provides an intuitive interface to tweak your watch’s time zone, guaranteeing you’re always on time, no matter where you are.
Change the time on your smartwatch from your phone
If you don’t want to fiddle with the tiny buttons on the watch, you can change the time using your paired Android phone. Your smartwatch must be paired to your phone for the duration of these steps.
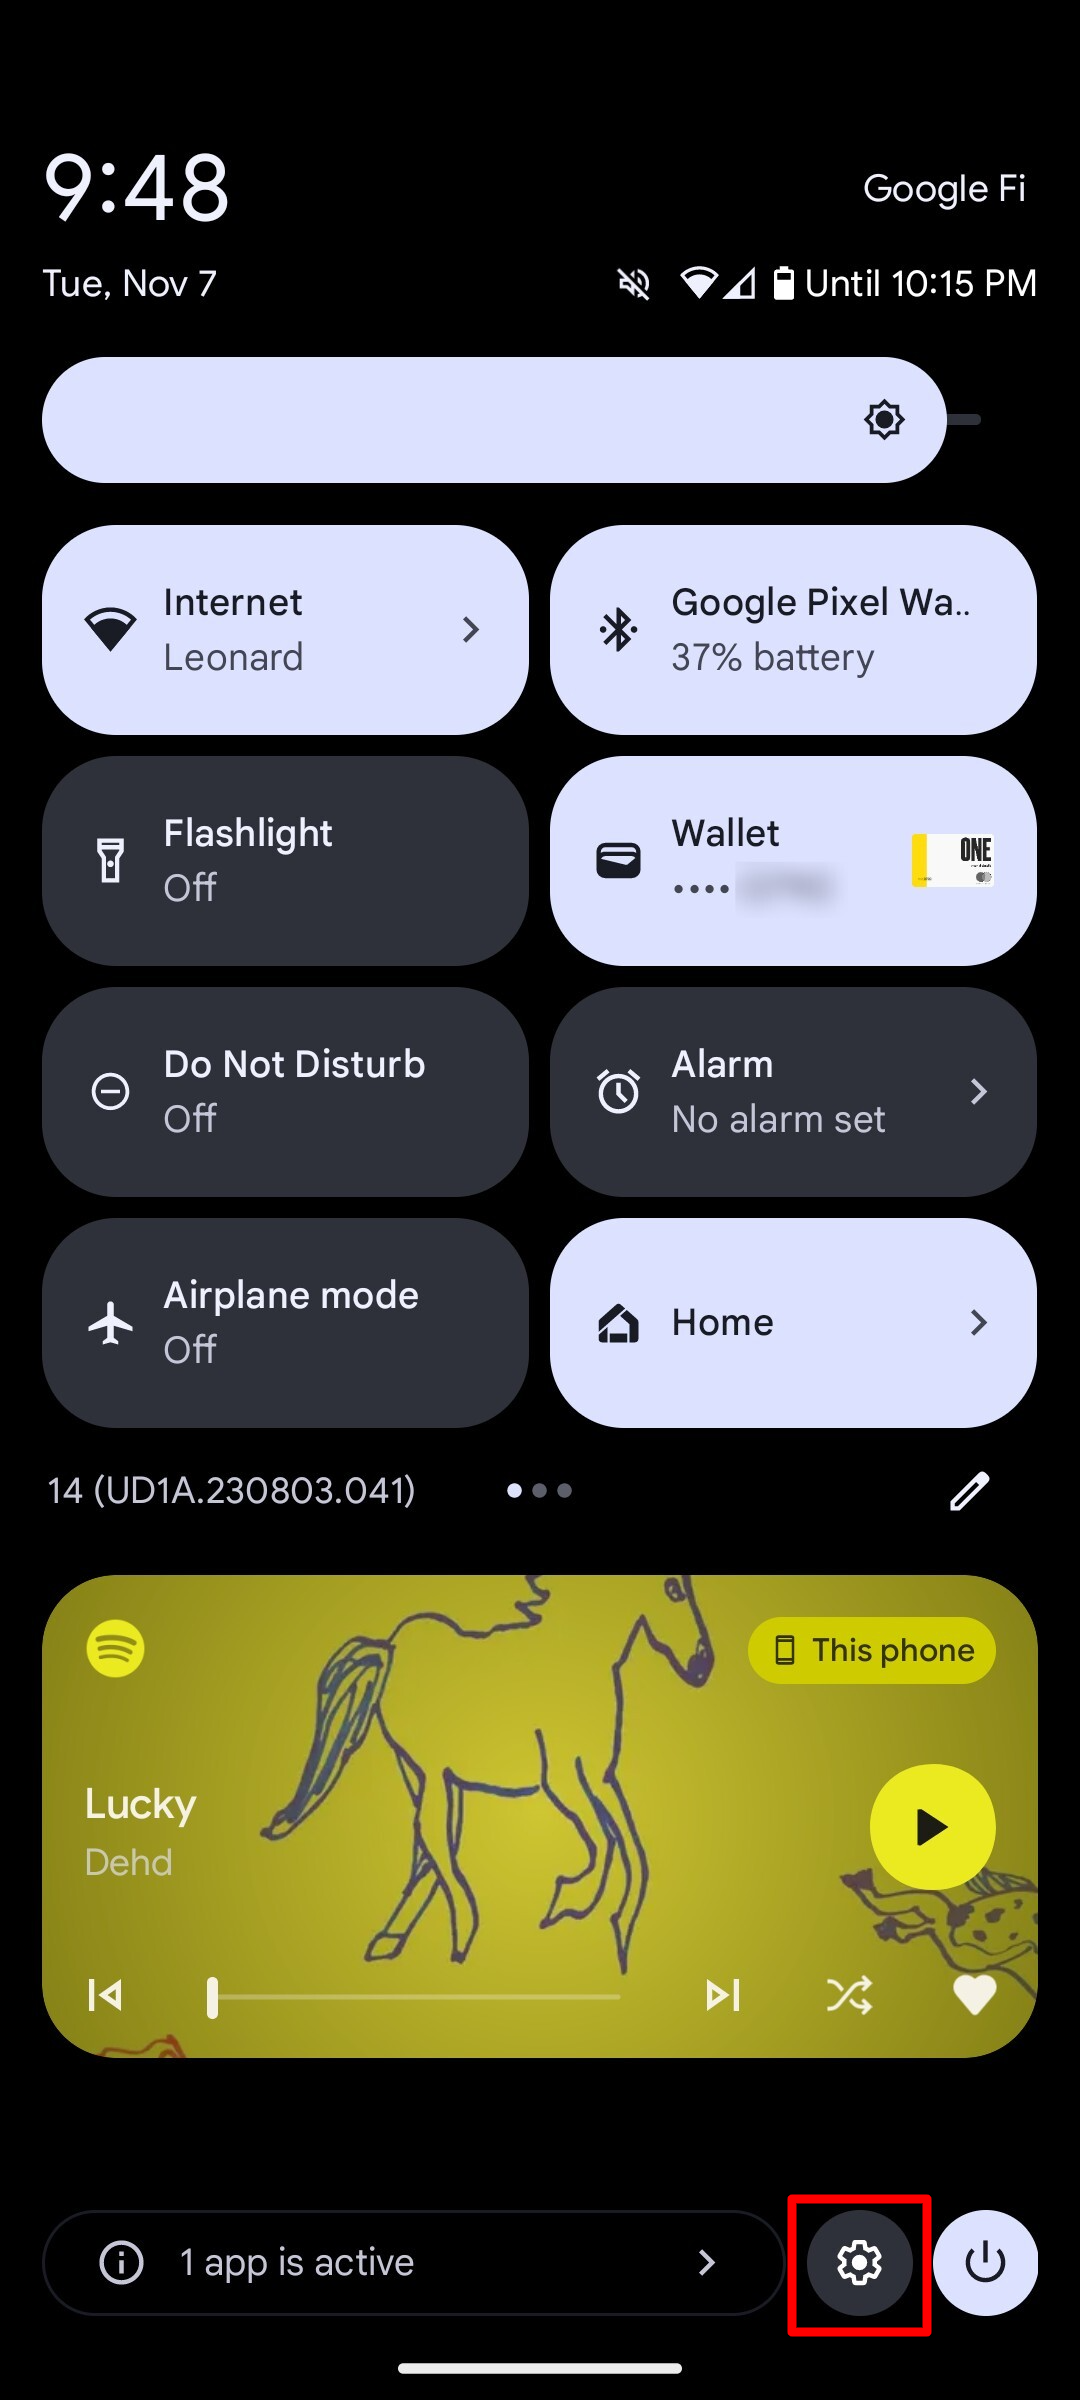
- Swipe down on your phone to display the control center.
- Tap the Settings icon to access the settings menu.

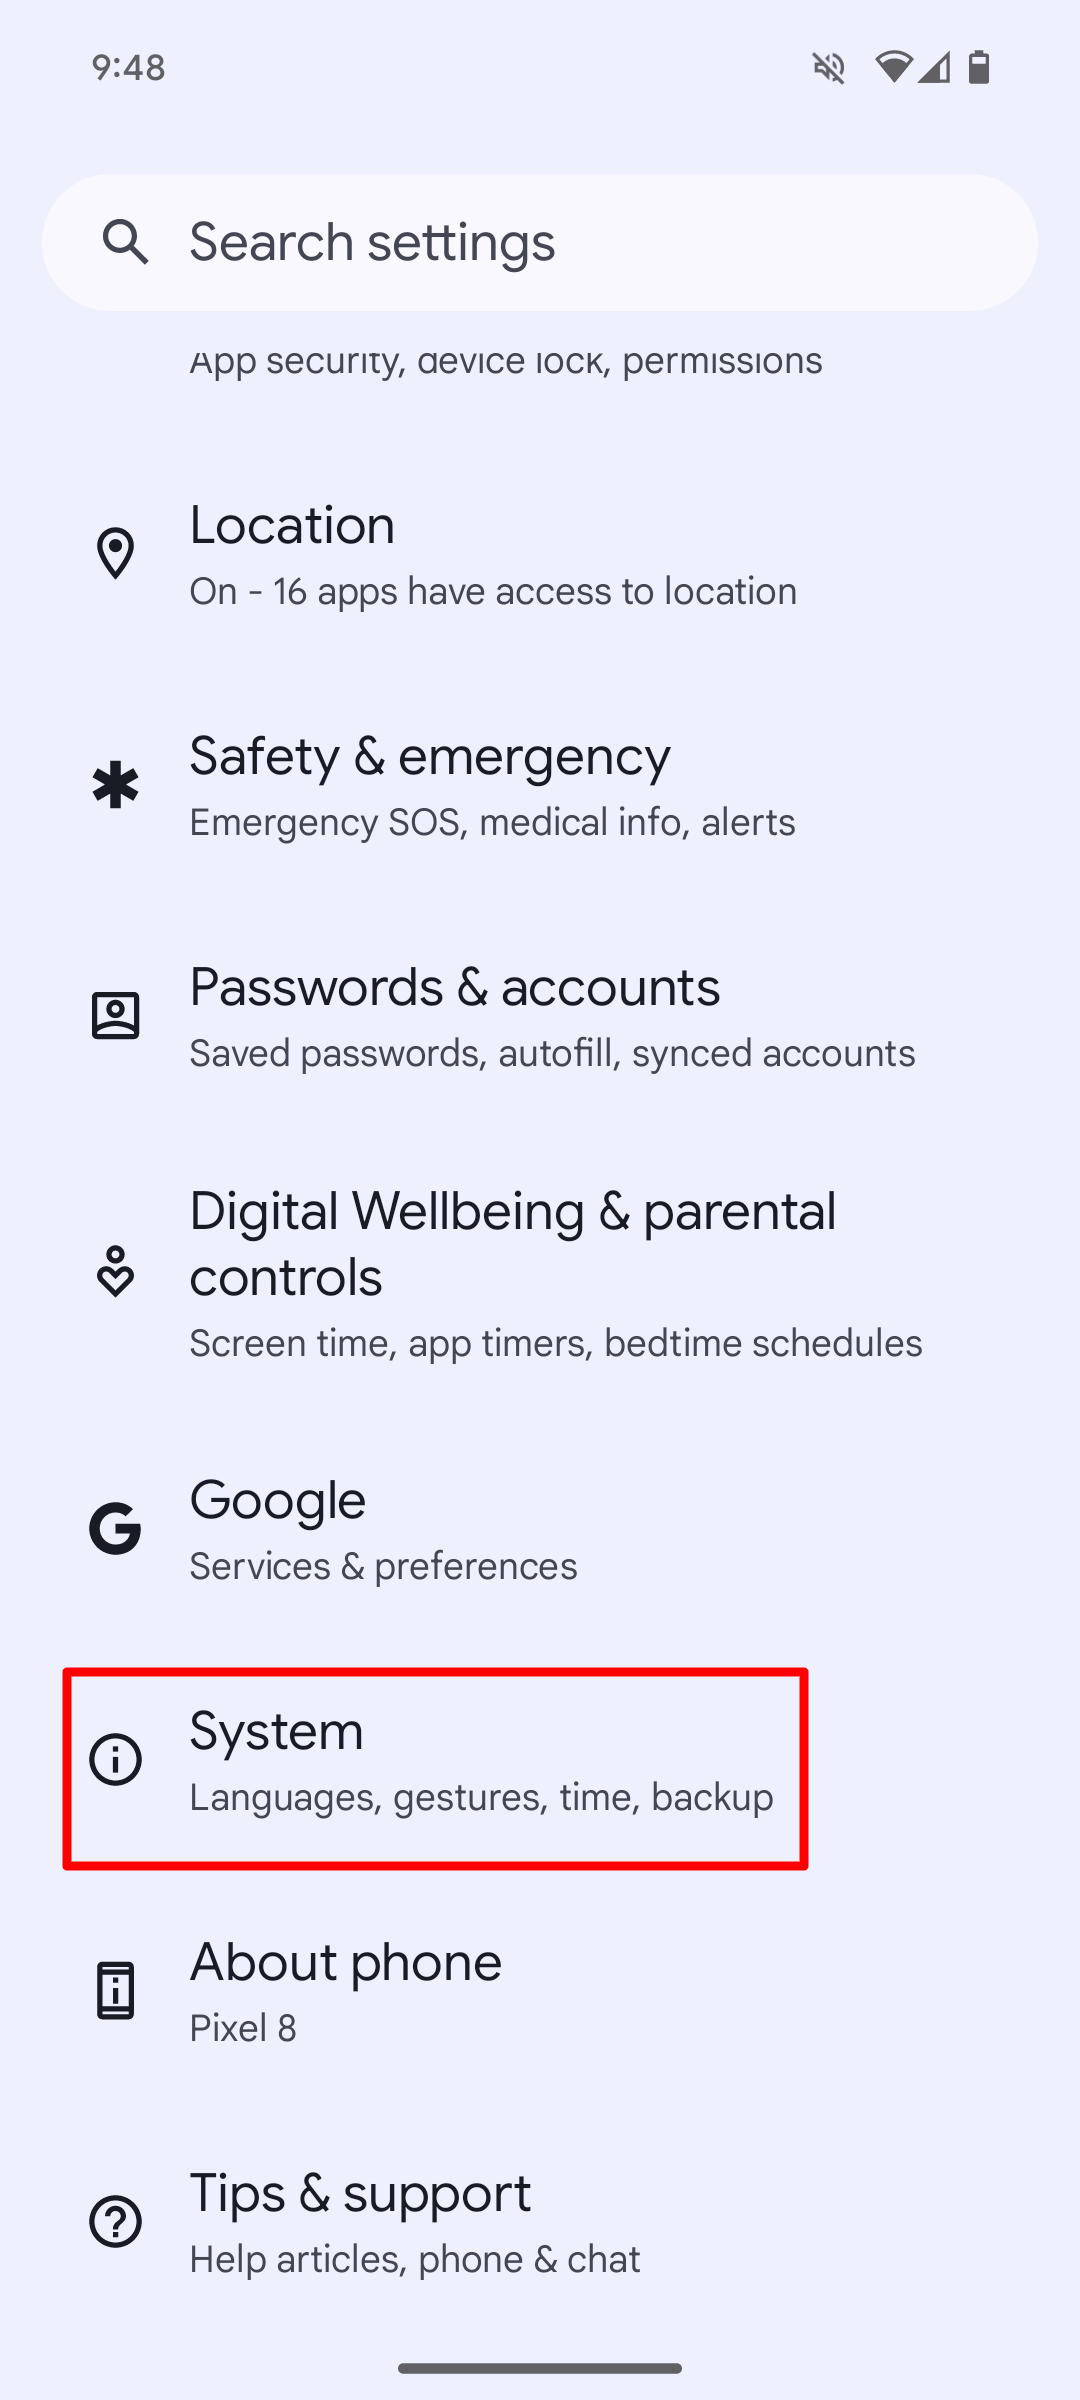
- Scroll down and tap the System option.
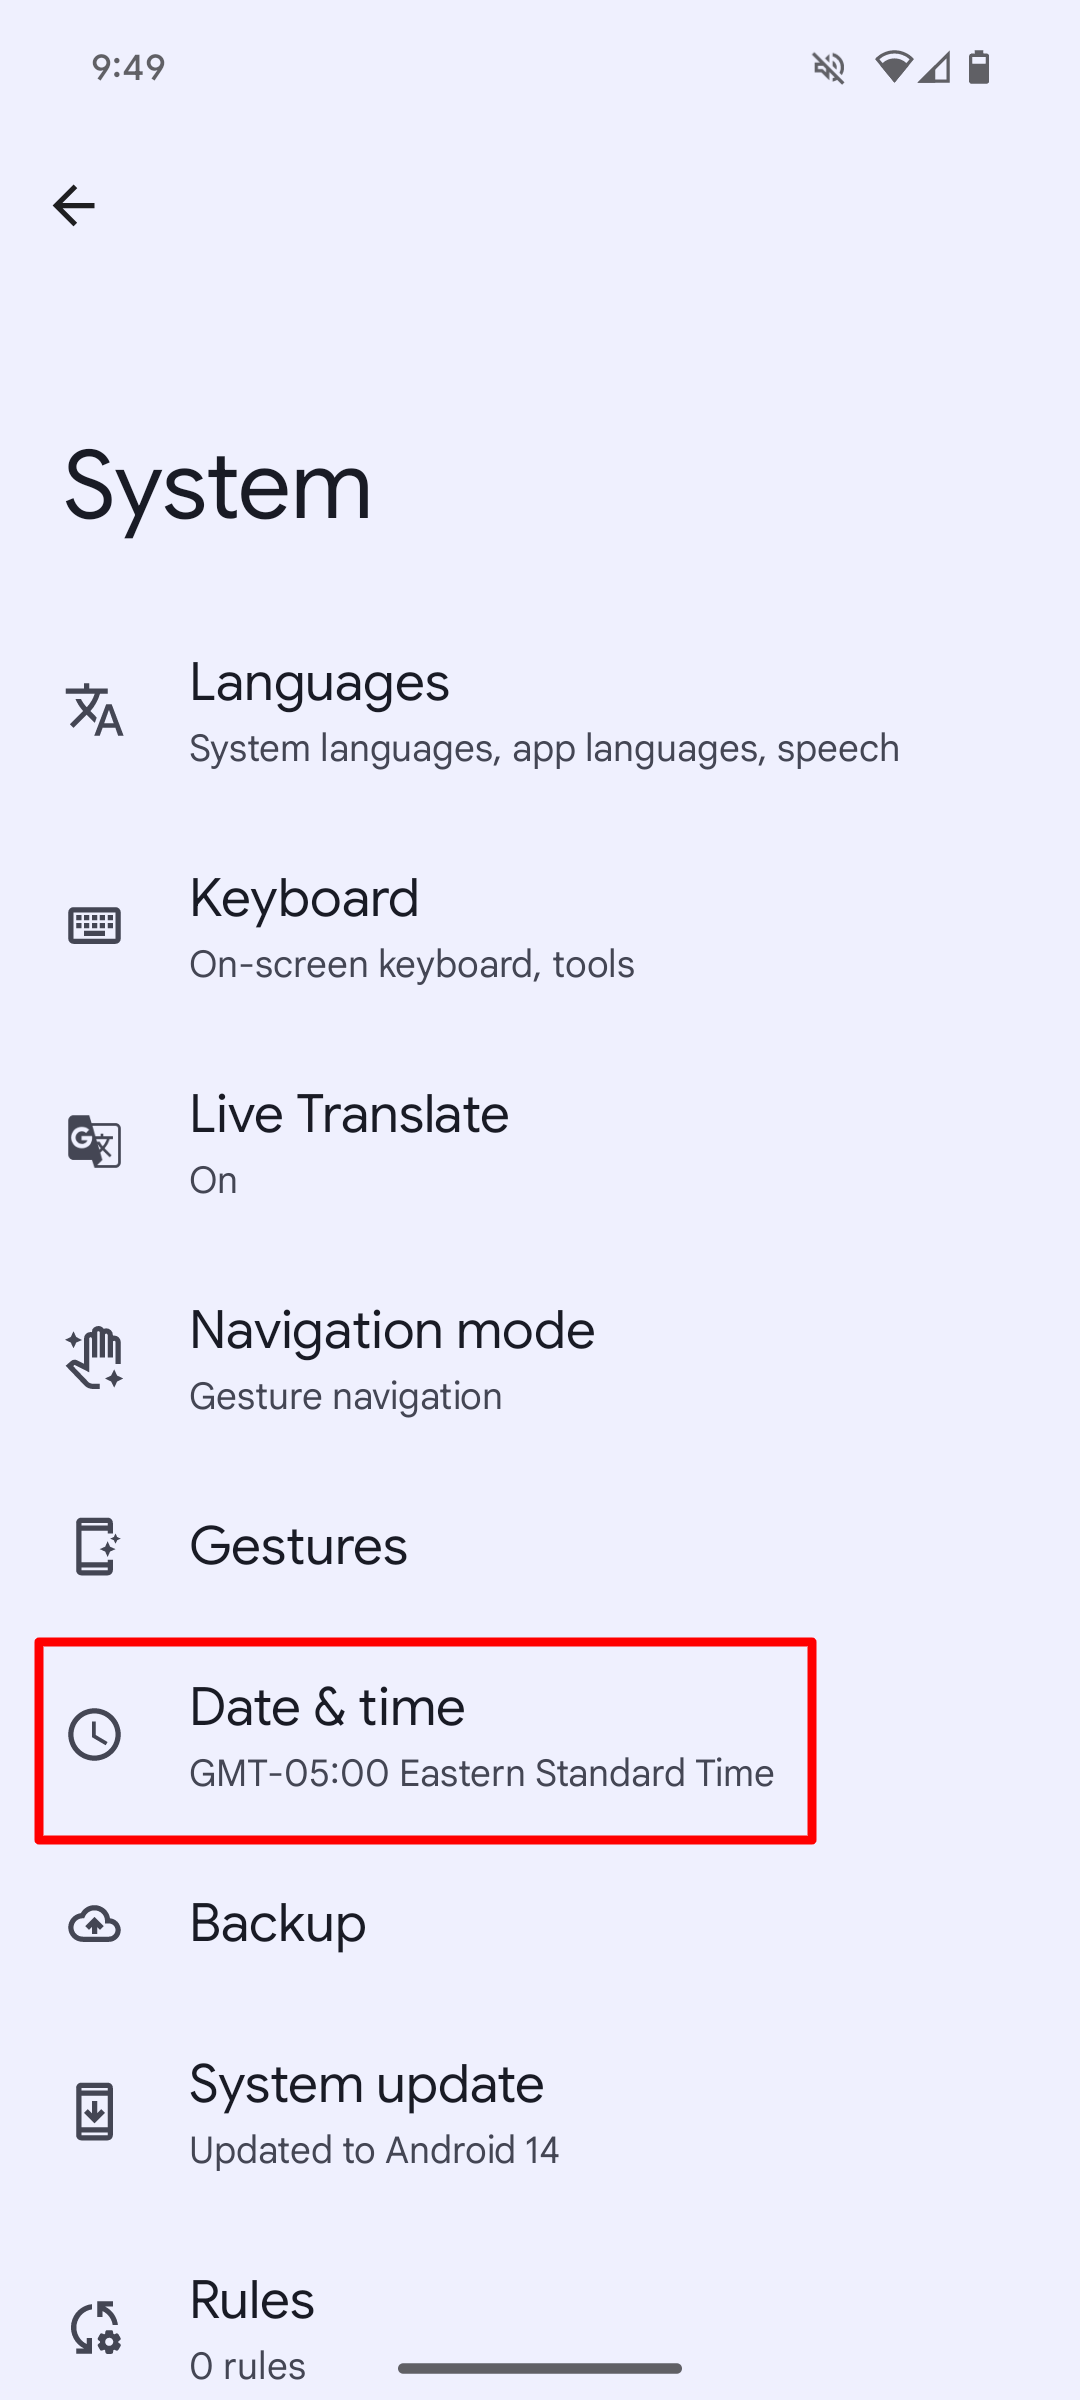
- In the System menu, locate and tap Date & time.
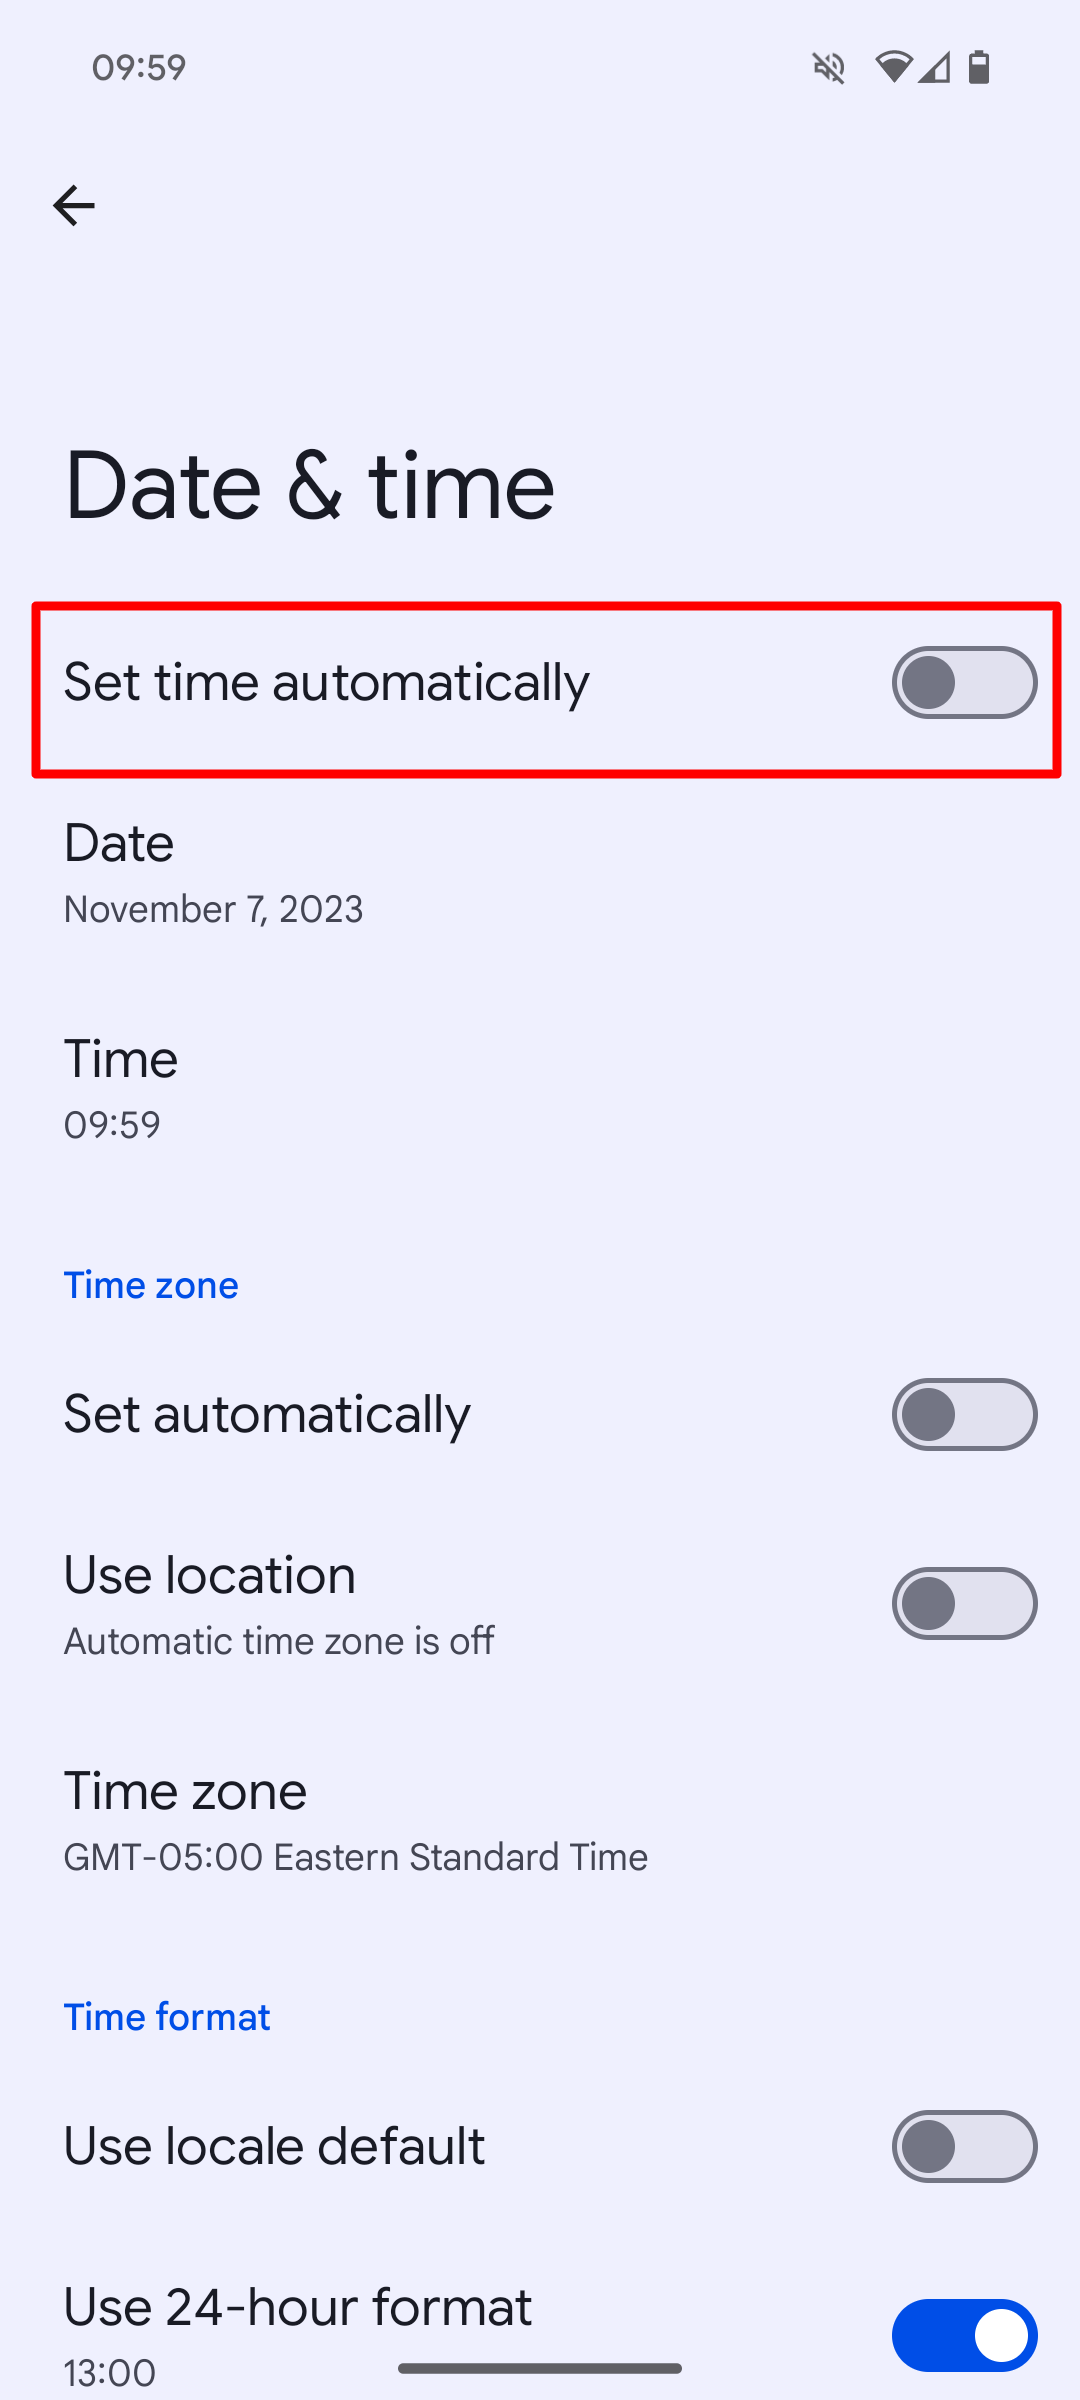
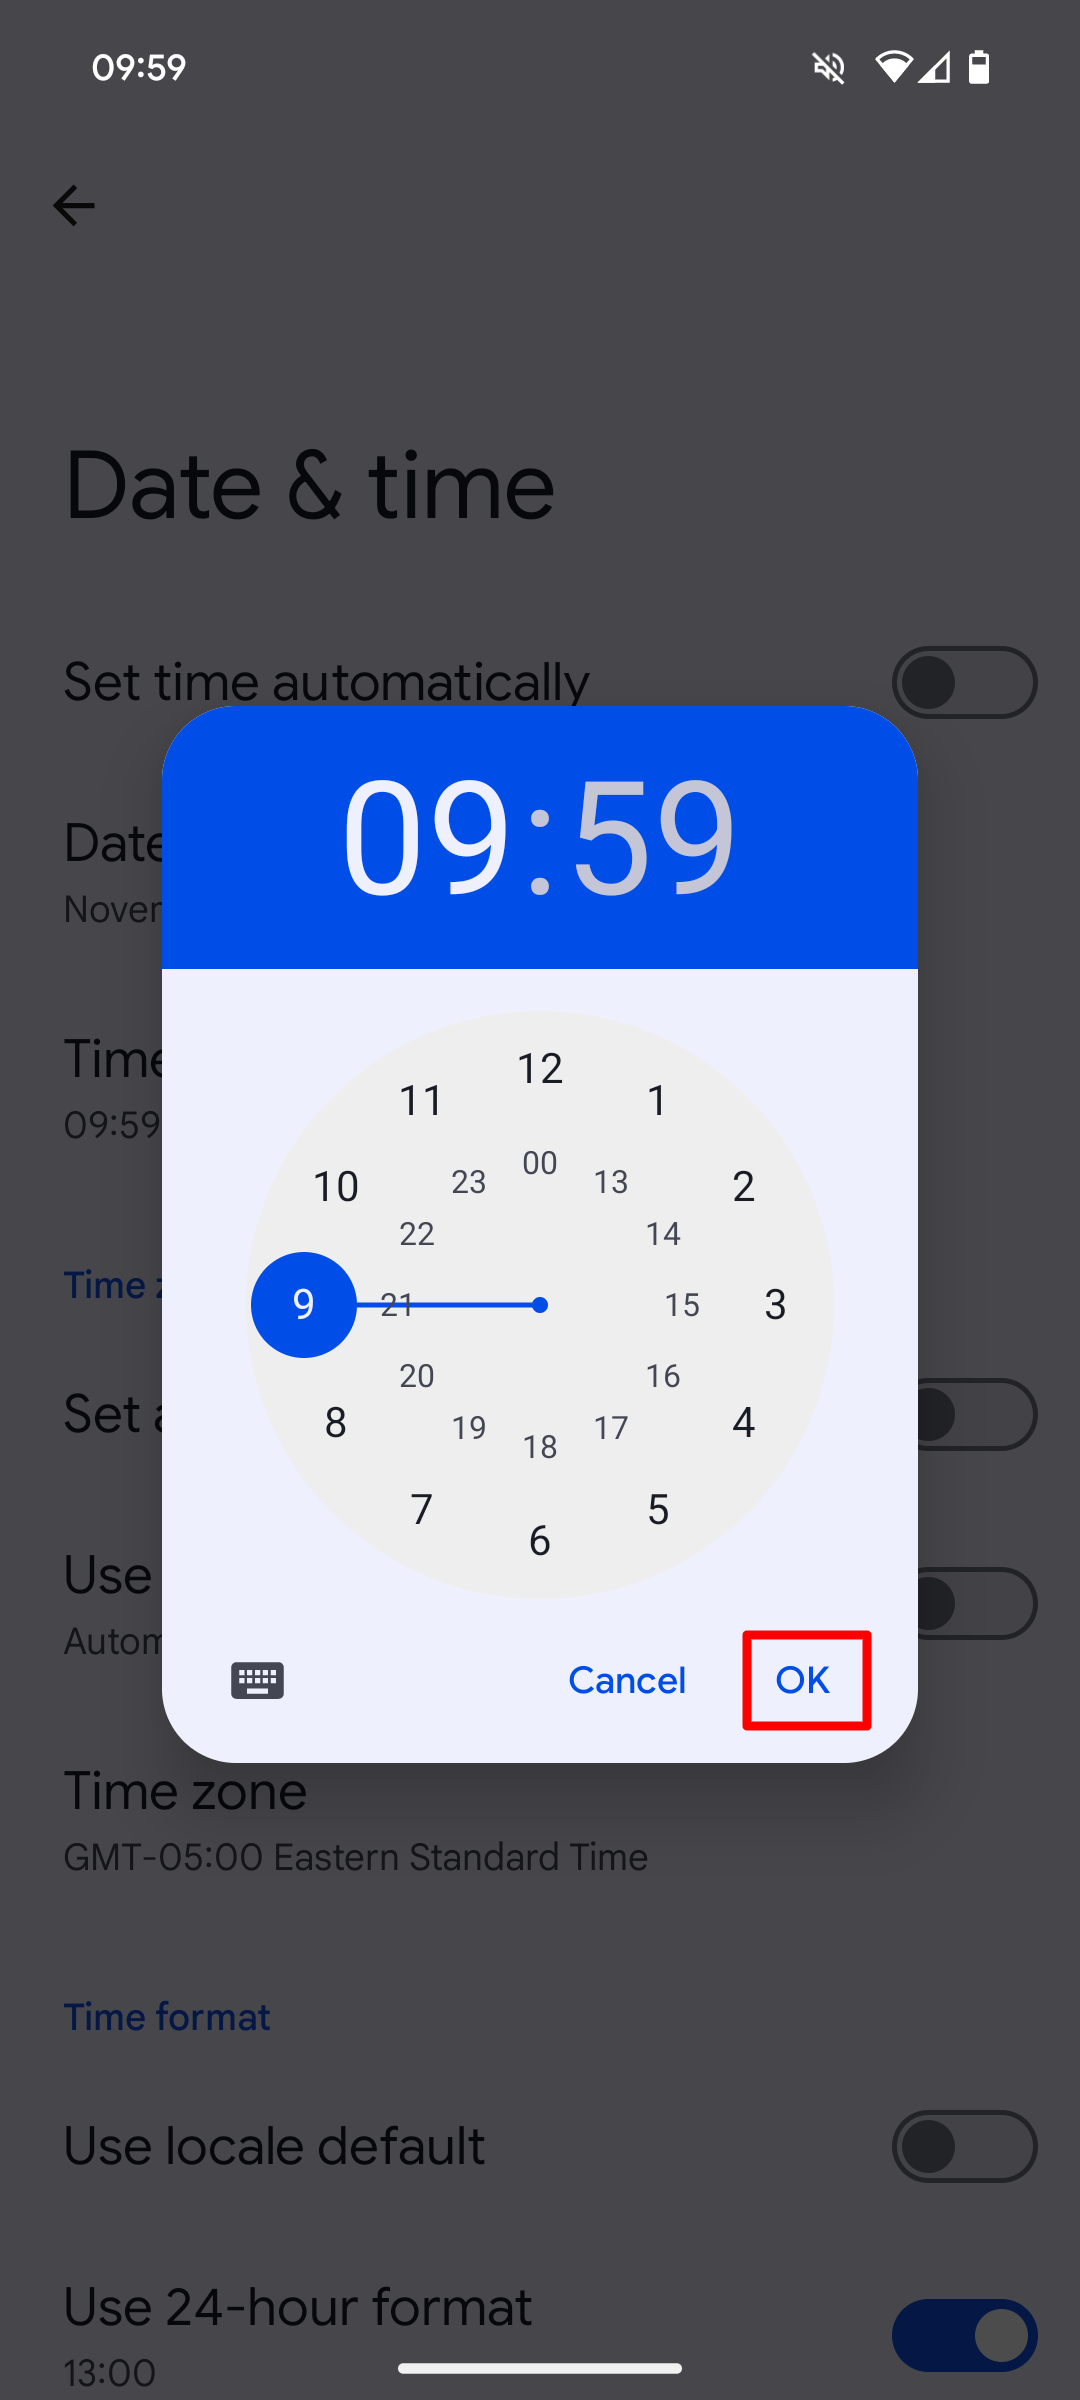
- Under Date & time, check if Set time automatically is turned on. If it is, turn it off.
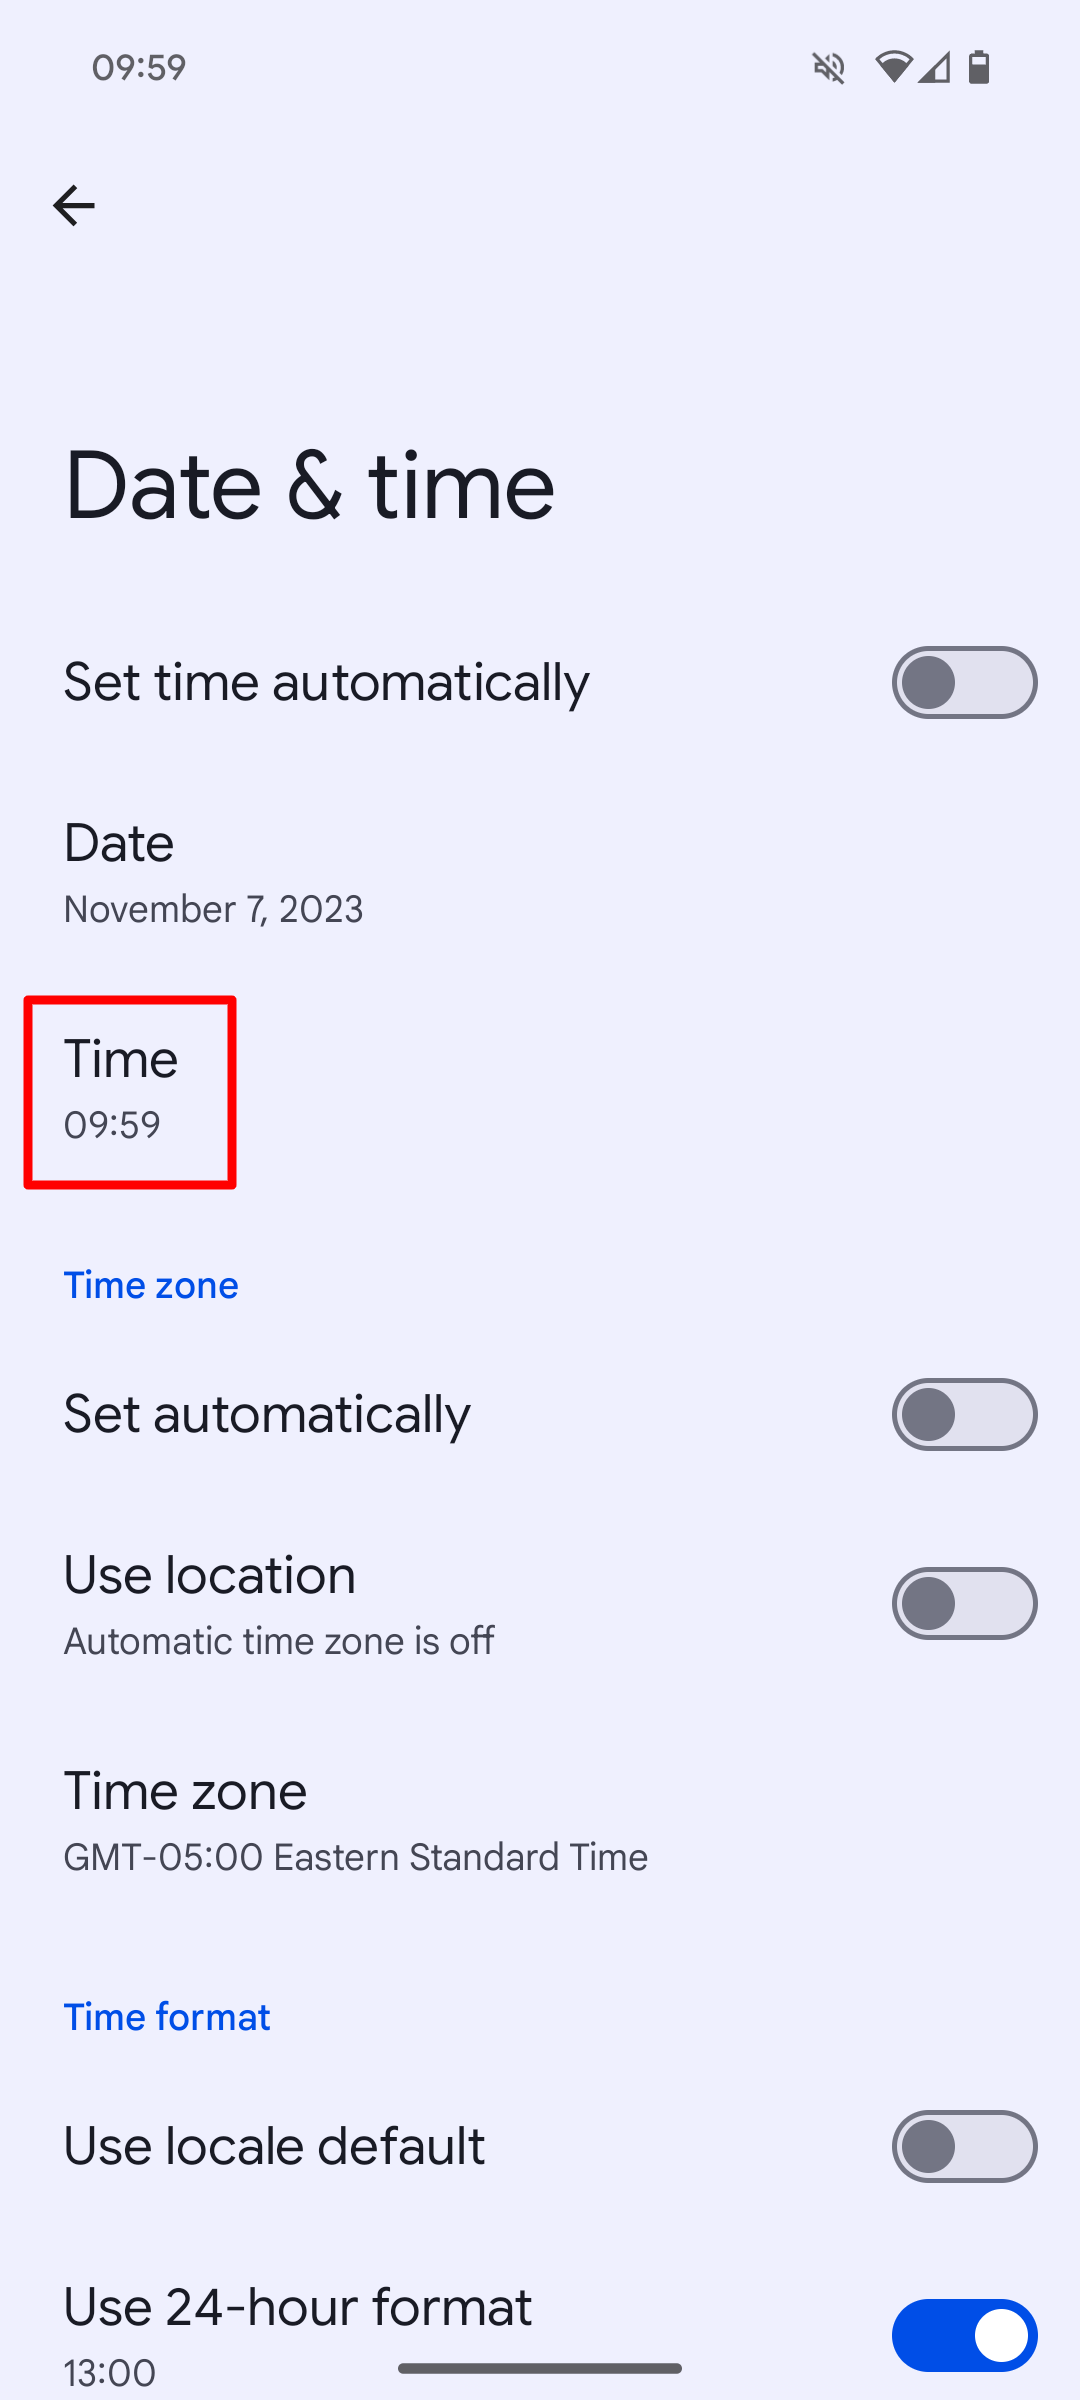
- Select Time.
- Adjust the time according to your preference. Tap OK to confirm your changes.
How to change to a 12 or 24-hour format on your smartwatch
For some Android smartwatches, switching to the 24-hour format can be done from the watch settings, allowing for a quick and hassle-free adjustment. You might need to take a different route with certain models. After pairing your smartwatch with your Android phone, you might need to change your phone’s settings, where you’ll find the option to customize your watch’s time format to the 24-hour clock.
Whether you prefer the standard 12-hour clock or the military-inspired 24-hour format, getting your smartwatch to display the time your way is a few taps away.
- Swipe down on your phone to display the control center.
- Tap the Settings icon to access the settings menu.
- Scroll down and tap System in the settings menu.
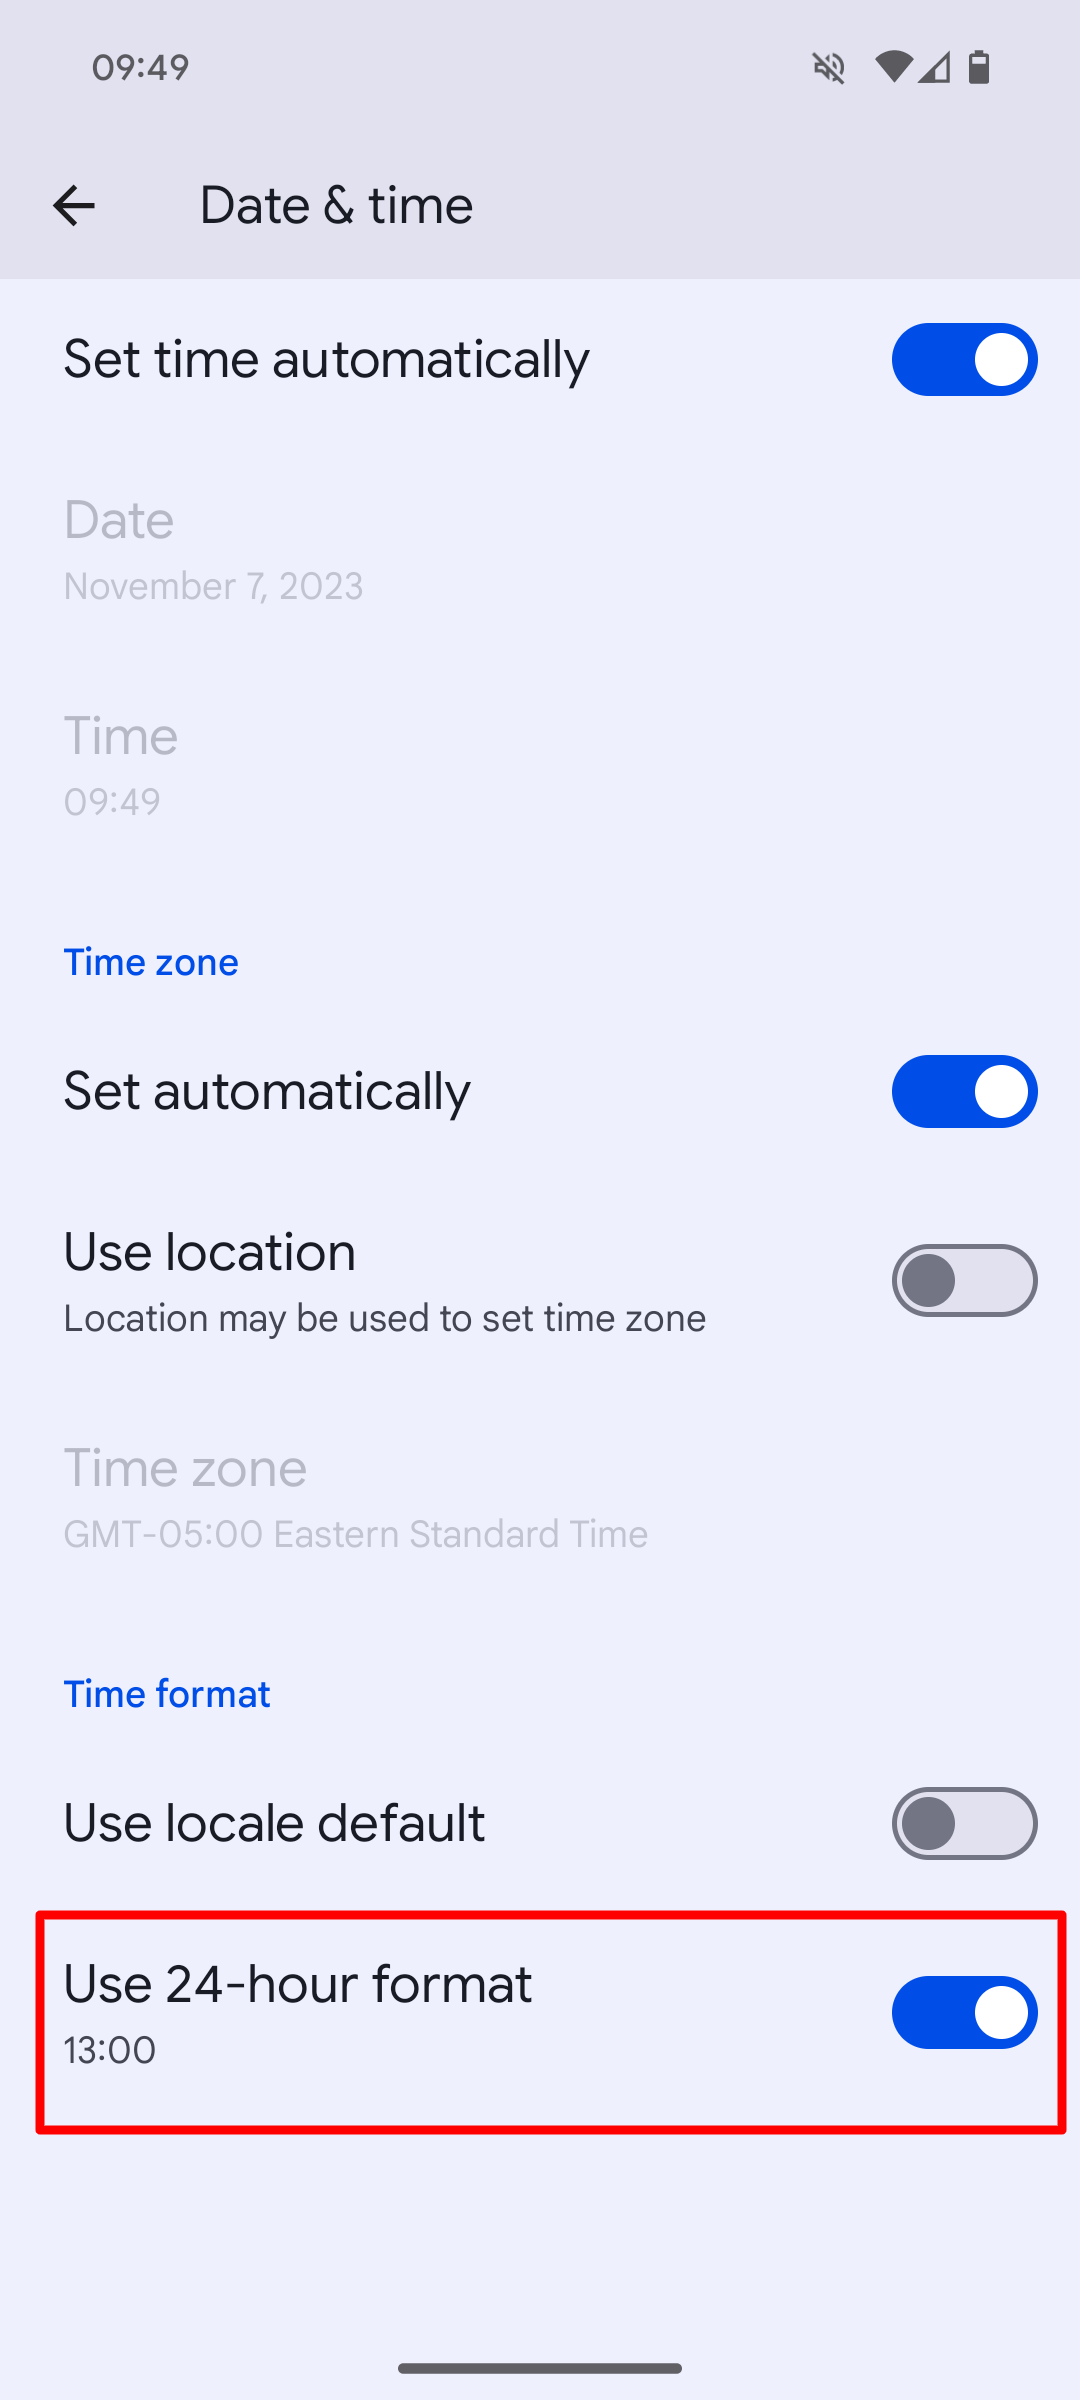
- On the System screen, tap Date & time to access the date and time settings.
- Under Time format, check if the Use local default is turned on. If it is, turn it off.
- Turn on Use 24-hour format to display the time in the 24-hour format.

Best Android smartwatches in 2024
Now with Wear OS 4
Have a better look at time with personalized watch faces
It’s easy to get caught by time zone changes, so knowing how to change the time on your Android smartwatch is crucial to avoid missing flights or meetings by hours.
If you’re new to Android smartwatches, we recommend exploring all the watch faces available. Customizing your smartwatch is easy. You can choose what information you see on your watch face, prioritize certain notifications, switch between digital or analog displays, and more.
Source link

