
Higher-resolution screens are becoming more common, which means less stress for our eyes. But higher resolutions can also make some features so detailed you need to zoom in to get the full picture, find the right accessibility settings, or examine an image in detail. While this is intuitive on a smartphone, such as with the accessibility options in Android 14, it’s not as clear on other platforms, such as Windows PCs.
Computers usually have zooming functions, including all our top-rated Chromebooks, and Windows is no exception. Here’s how to zoom in and out on Windows, depending on your requirements.
How to zoom in and out on Windows using Magnifier
If you want an always-available floating zoom tool you can use any time to zoom in and out on Windows, the Magnifier tool is the best option. It’s part of the accessibility tool set in Windows and is easy to adjust by heading to the settings below.
- In the Windows search bar, search for “Accessibility.” An option appears to go to the Accessibility or Ease of Access settings. Choose it to move forward.
- Look for the side menu when the accessibility window opens. Click Magnifieroptions to continue.
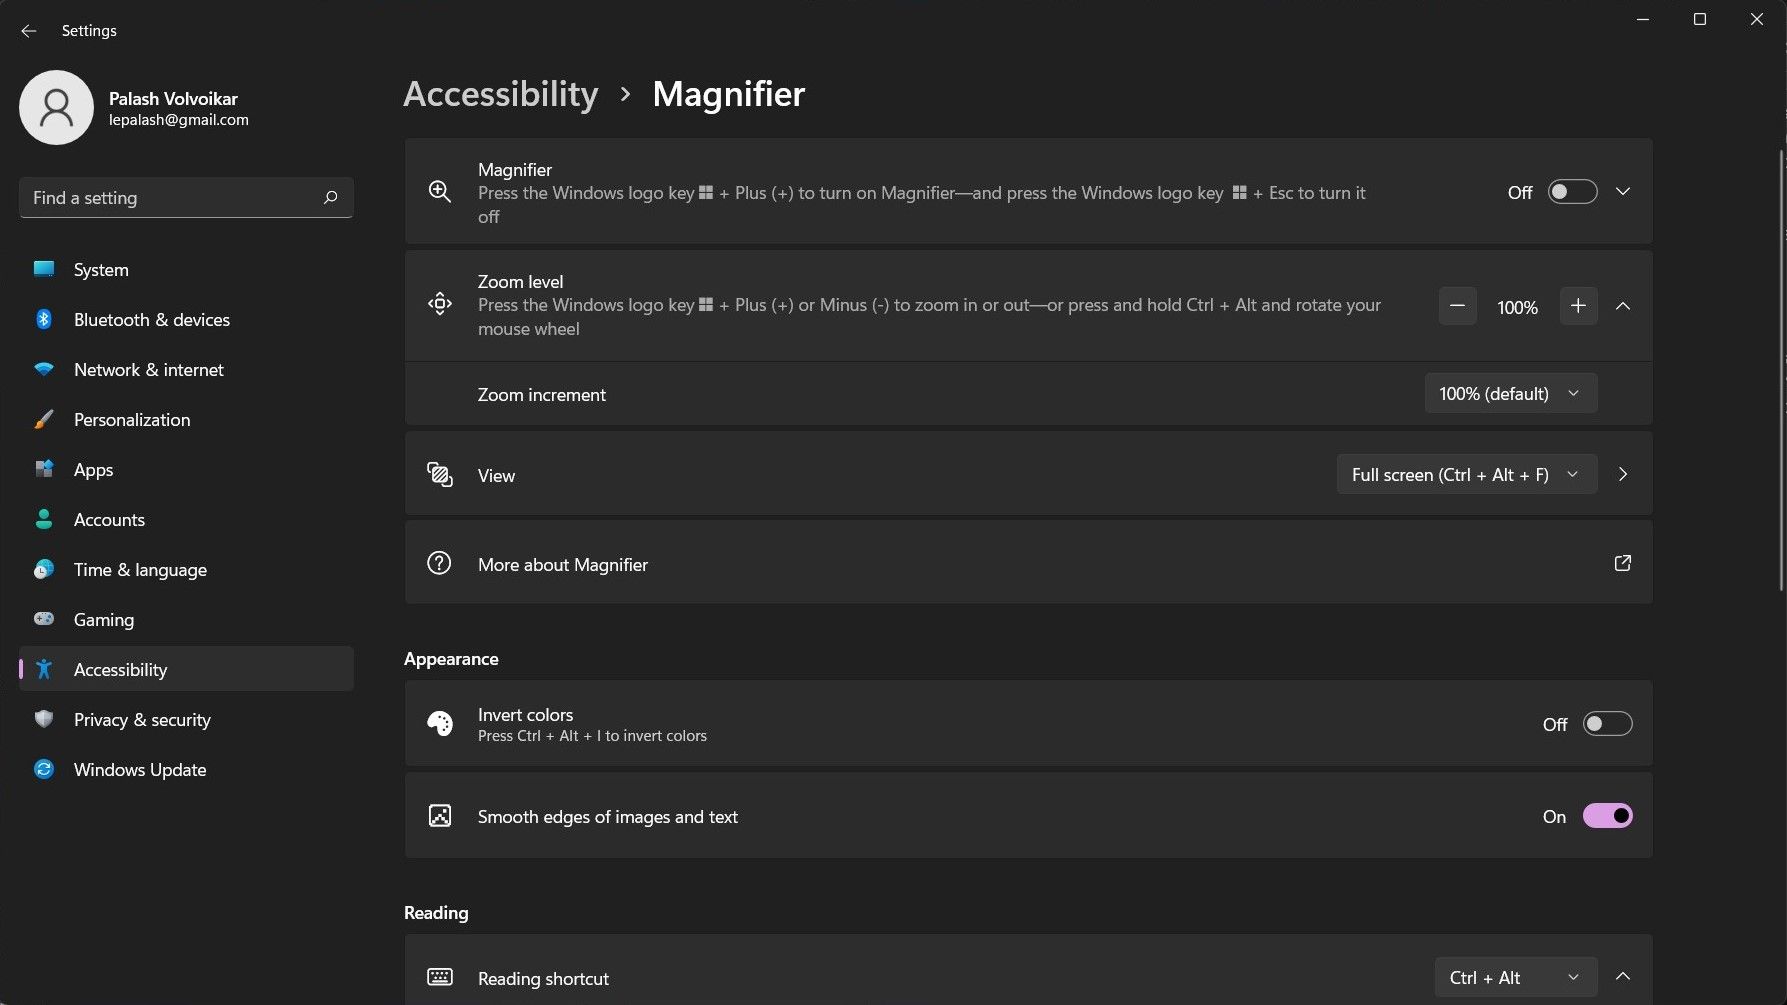
- Click the toggle next to Magnifier to turn it on.
- These steps are important to see how Magnifier works in settings, but you can switch it on with a keyboard shortcut. This move is convenient for accessibility purposes. Press the Windows Logo Key and the Plus sign (+) sign to turn on Magnifier. Press the Windows Logo Key and Esc to turn off Magnifier.
- To close Magnifier, click the X button (close) on the floating toolbar, or press Windows + Esc.
- Some Windows computers have touchscreens. If you use only the touchscreen without a keyboard, look at the corners of the screen to see small plus and minus symbols. Those automatically enlarge the content of the screen for you. Or, pinch and enlarge as you need for certain pieces of content.

Unless you configured Magnifier using the Zoom level option, you get a 200% magnified screen. To navigate to the parts of the screen you can’t see, move your cursor in the respective direction. But this set magnification doesn’t work for everyone or every task, so learning how to customize its settings is important. These steps will help you customize the Magnifier feature.
- In the settings menu, use the option to Change zoom level with either plus or minus options or by changing the zoom in a drop-down menu. You can also press Windows and the + or – keys to zoom in or out while Magnifier is on.
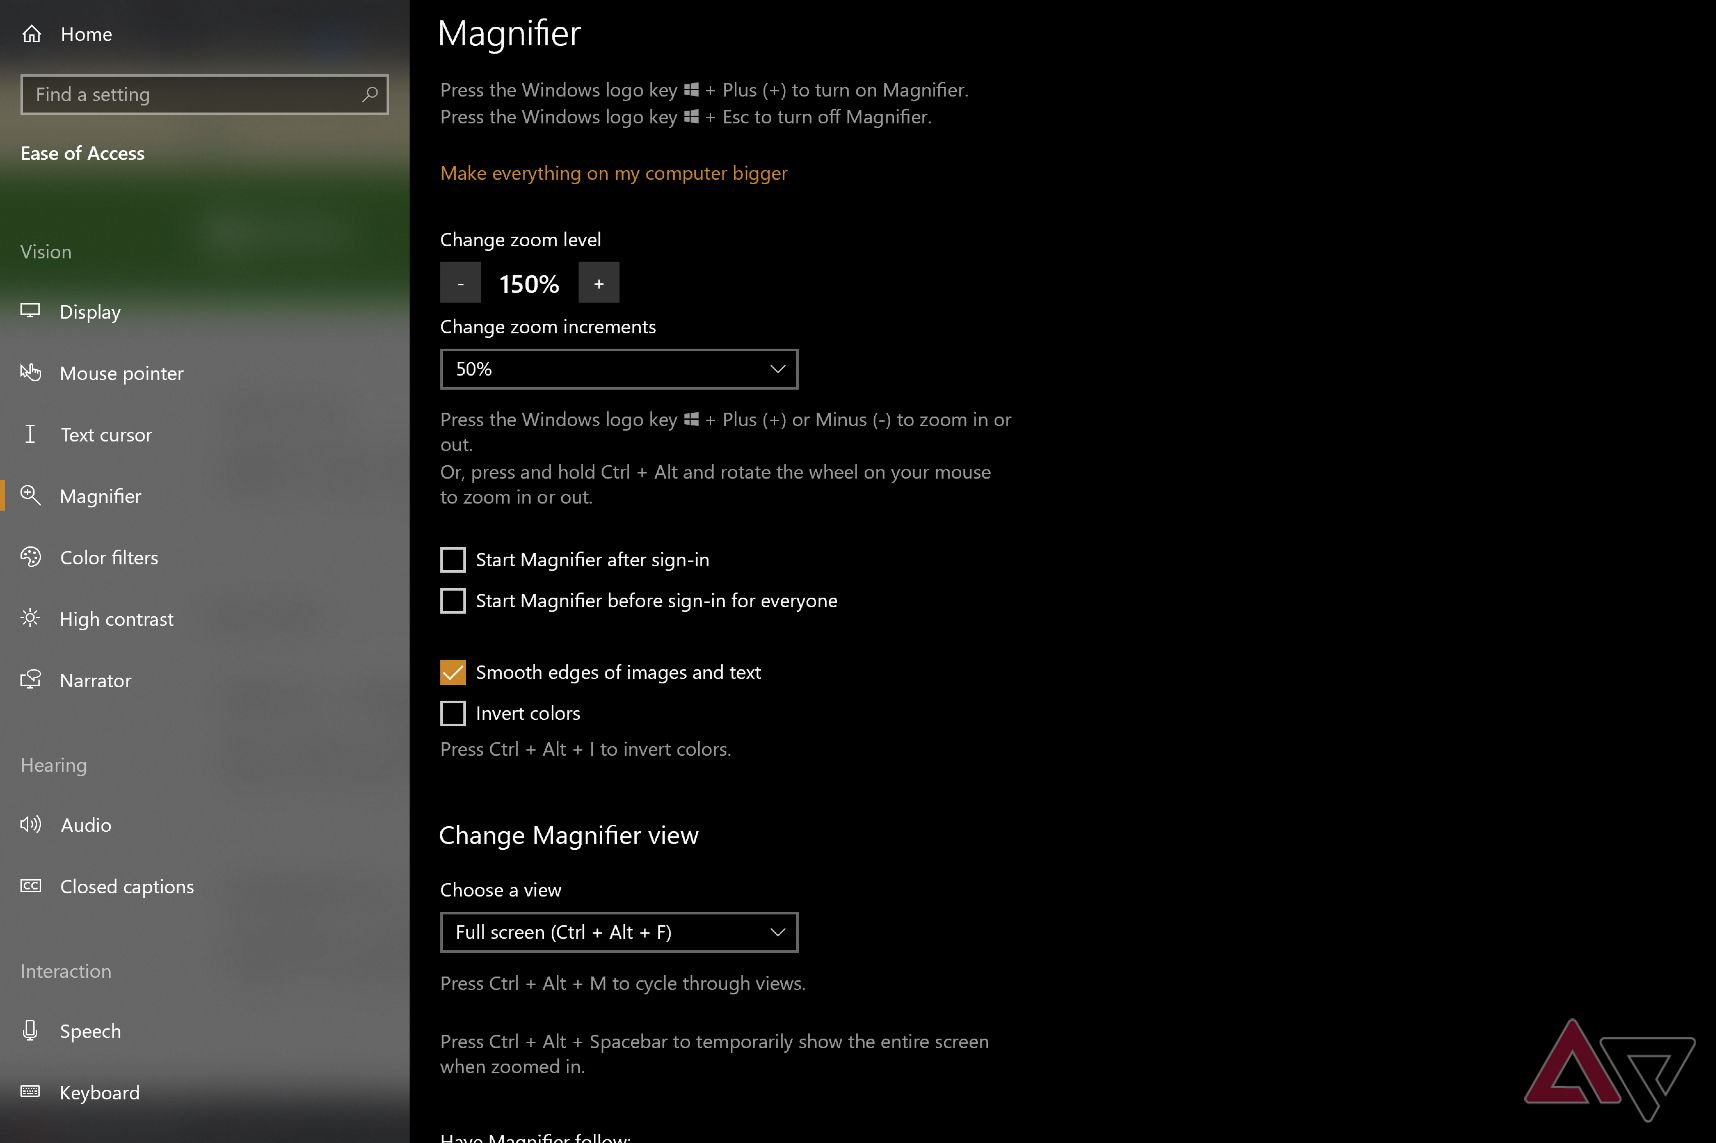
- You also have several toggles, depending on the version of Windows you use. For example, you may see options to automatically start Magnifier after logging in, which is a timesaver for those who always use it. You can restrict this to only one user to tailor options if multiple people use the PC.
- Another option is the ability to invert colors, which may be helpful when dealing with certain vision problems.
- You also have the option to change how Magnifier looks, whether you want it to be the full screen, a docked view, or work like a lens. Different formats may work better for editing, viewing hard-to-read content online, and more.

We used Windows 11 for this guide, but the steps for Windows 10 are more or less the same. Magnifier also works similarly on Windows 8 and Windows 7. You can open it via search.
Zoom in and out with Windows display scaling
The Magnifier tool is good for a zooming option to clarify details, but you can also tweak the format to help everything appear larger naturally. To increase the size of the text and other elements on your Windows desktop, use the in-built display scaling option by following the steps below.
- Open Windows Settings, and click Display under System.
- Scroll down and click the drop-down selector with the percentage under Scale.
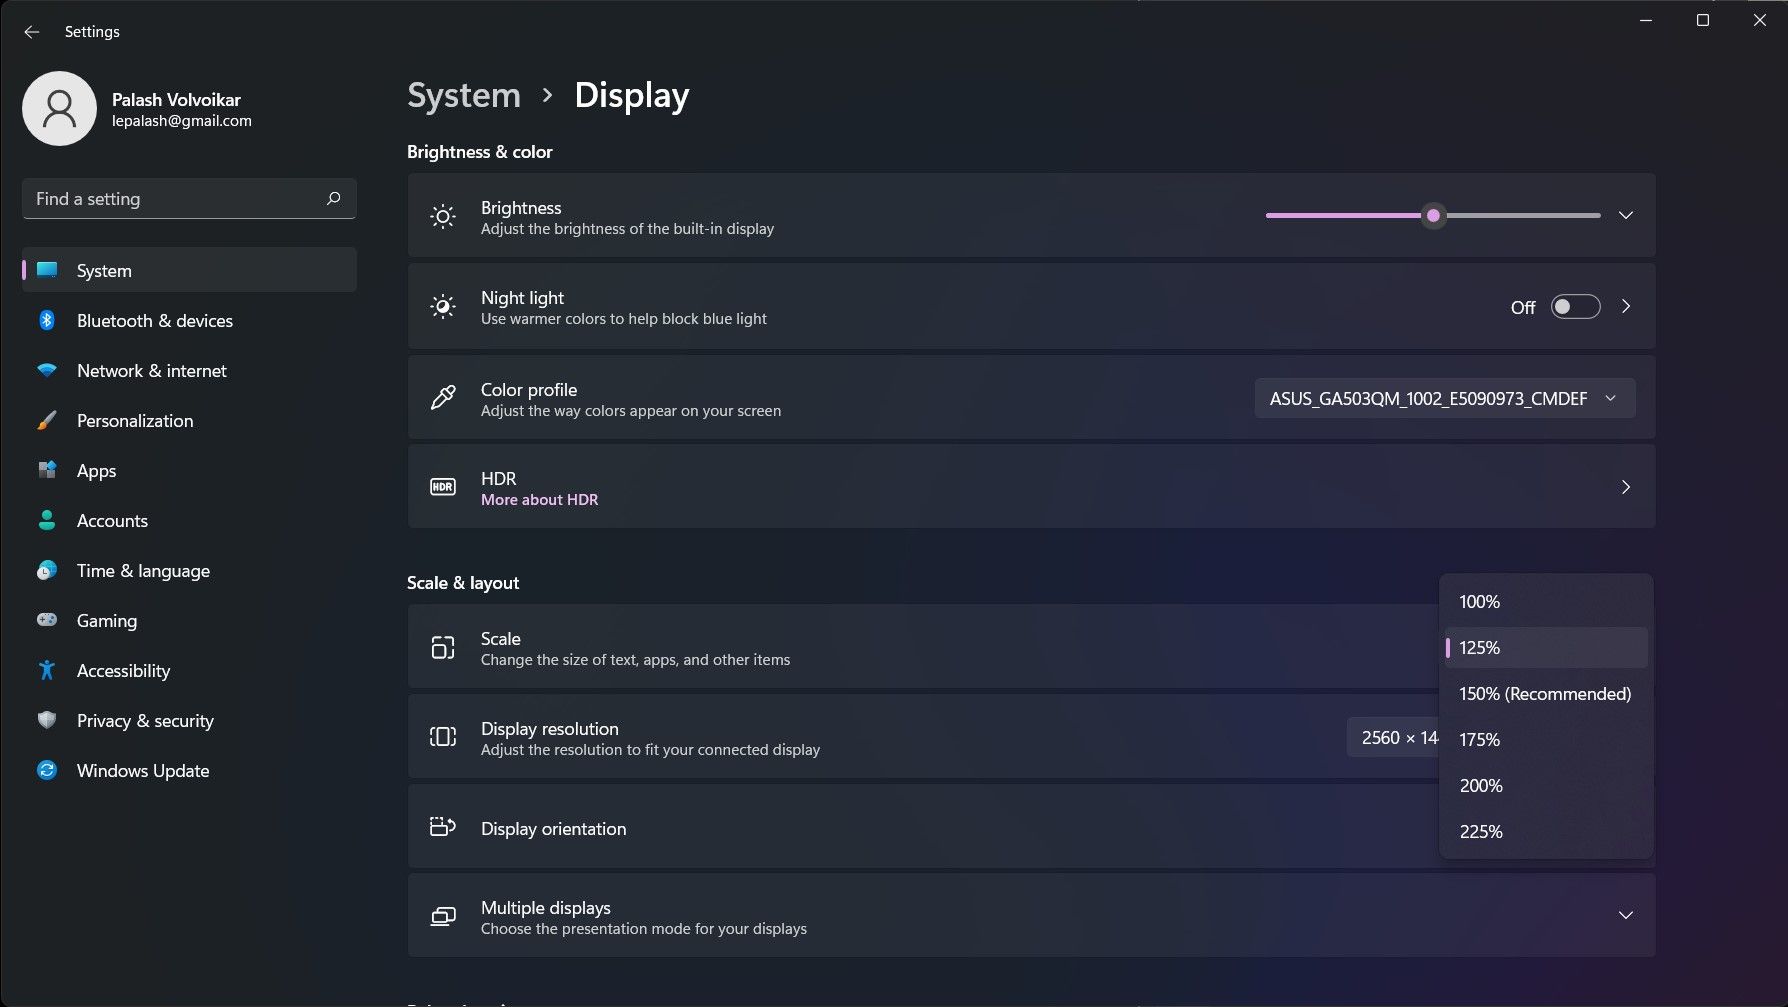
- Pick the percentage you wish to apply by clicking it.
- Some versions of Windows ask you to log out and log back in to apply the scaling changes. Do so if prompted.

This option isn’t as useful for accessibility, but it can help users if a high-resolution screen makes the text and menus too small. It also helps you adjust a second display or new display to match existing formatting since a new monitor can sometimes make things look strange.

13 ingenious ways to use the Windows Command prompt
There might be a few methods that you didn’t know about
Bonus: How to zoom in and out in Google Chrome and mst other browsers
Many apps, including Google Chrome, have their own zoom options. For Google Chrome, follow the steps below to zoom in and out. These steps apply to other web browsers, including Mozilla Firefox and Microsoft Edge.
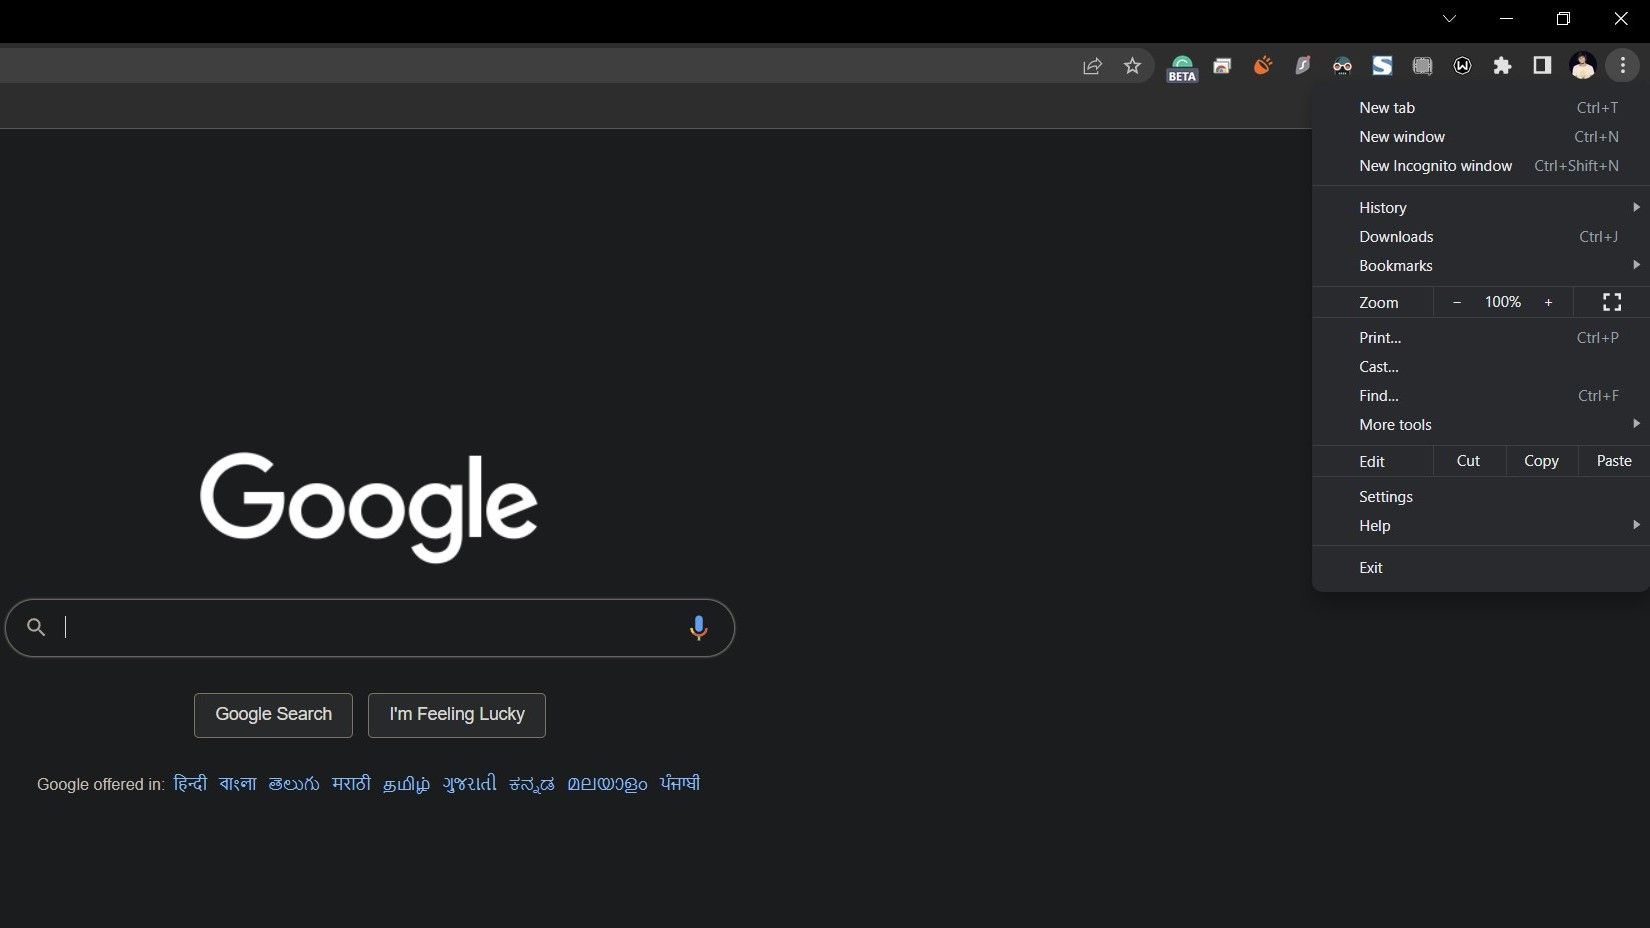
- Click the three-dot menu button in the upper-right corner.
- Locate the Zoom option.
- Click + to zoom in and – to zoom out.

Getting used to zooming in and out on Windows
Those are all the ways to zoom in and out on Windows. Touchpad gestures and keyboard shortcuts are universal, so you can use them across the board to quickly zoom in or out. The Windows zoom options are intuitive, so once you pick it up, you shouldn’t have too much trouble using it again. If your Windows PC stutters while zooming in and out, there are a few things you can try to speed up your computer.
Source link
