
For the most part, even the most affordable Chromebooks are extremely easy to use and maintain. As long as you regularly update ChromeOS, you can run the Chromebook’s Diagnostics app to fix other issues. But if you’d rather take matters into your own hands, Crosh will let you tinker to your heart’s desire. Crosh displays information about your ChomeOS system, including battery health, memory stats, error troubleshoots, and more.
Like most terminal applications, Crosh can look and feel intimidating for new users. This guide will help you get acquainted with Crosh while learning basic terminal commands.
What is Crosh?
Crosh, or the ChromiumOS shell, is a command-line interface that runs text-based terminal commands on your Chromebook. The program is standard on ChromeOS and does not require any setup. These commands are designed to access data from all over your device without waiting or searching around. Crosh can also govern your general keyboard commands for elsewhere on your laptop.
Crosh can check your old Chromebook for faults and assess a new laptop’s capabilities. Using Crosh can be confusing at first, so check out the following commands to get started.

Chromebook: How to check for ChromeOS updates
The easiest way to keep your Chromebook up-to-date
Crosh terminal command basics
Getting results from the following codes depends on accuracy, with even minor errors resulting in the command not being recognized. If you believe a command isn’t working, you may want to make sure there aren’t any spacing or spelling errors.
How to enter commands into Crosh
Commands can be entered when the app is opened and re-entered as many times as necessary. The app is structured like a web browser, allowing you to open multiple tabs at once. Commands are entered in and commenced from this page. Here’s what to do:
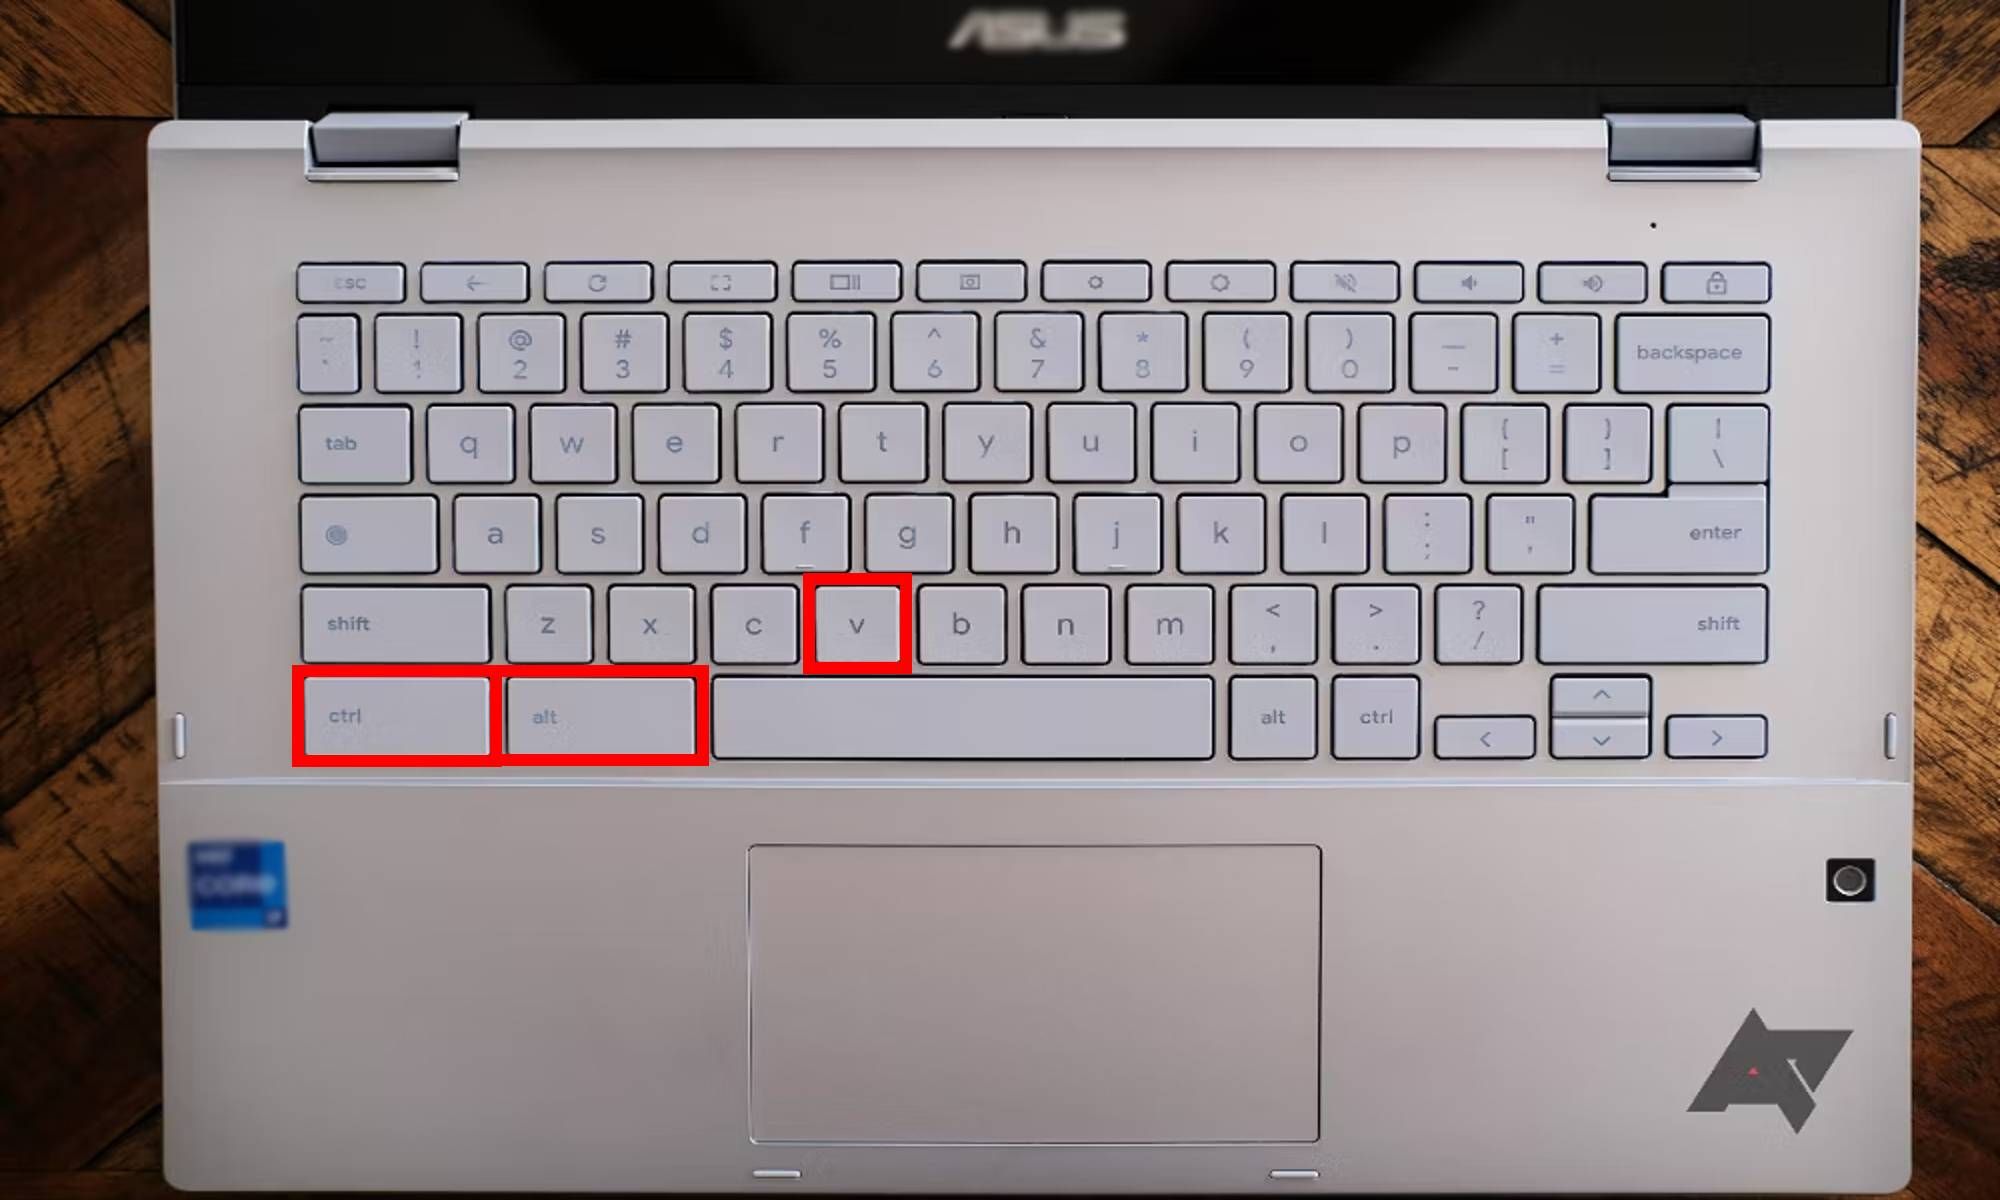
- Press Ctrl + Alt + V to open the Crosh terminal.
- A black screen with small text appears in the upper-right corner of the screen, with crosh> highlighted in yellow. A flashing cursor appears next to this text.
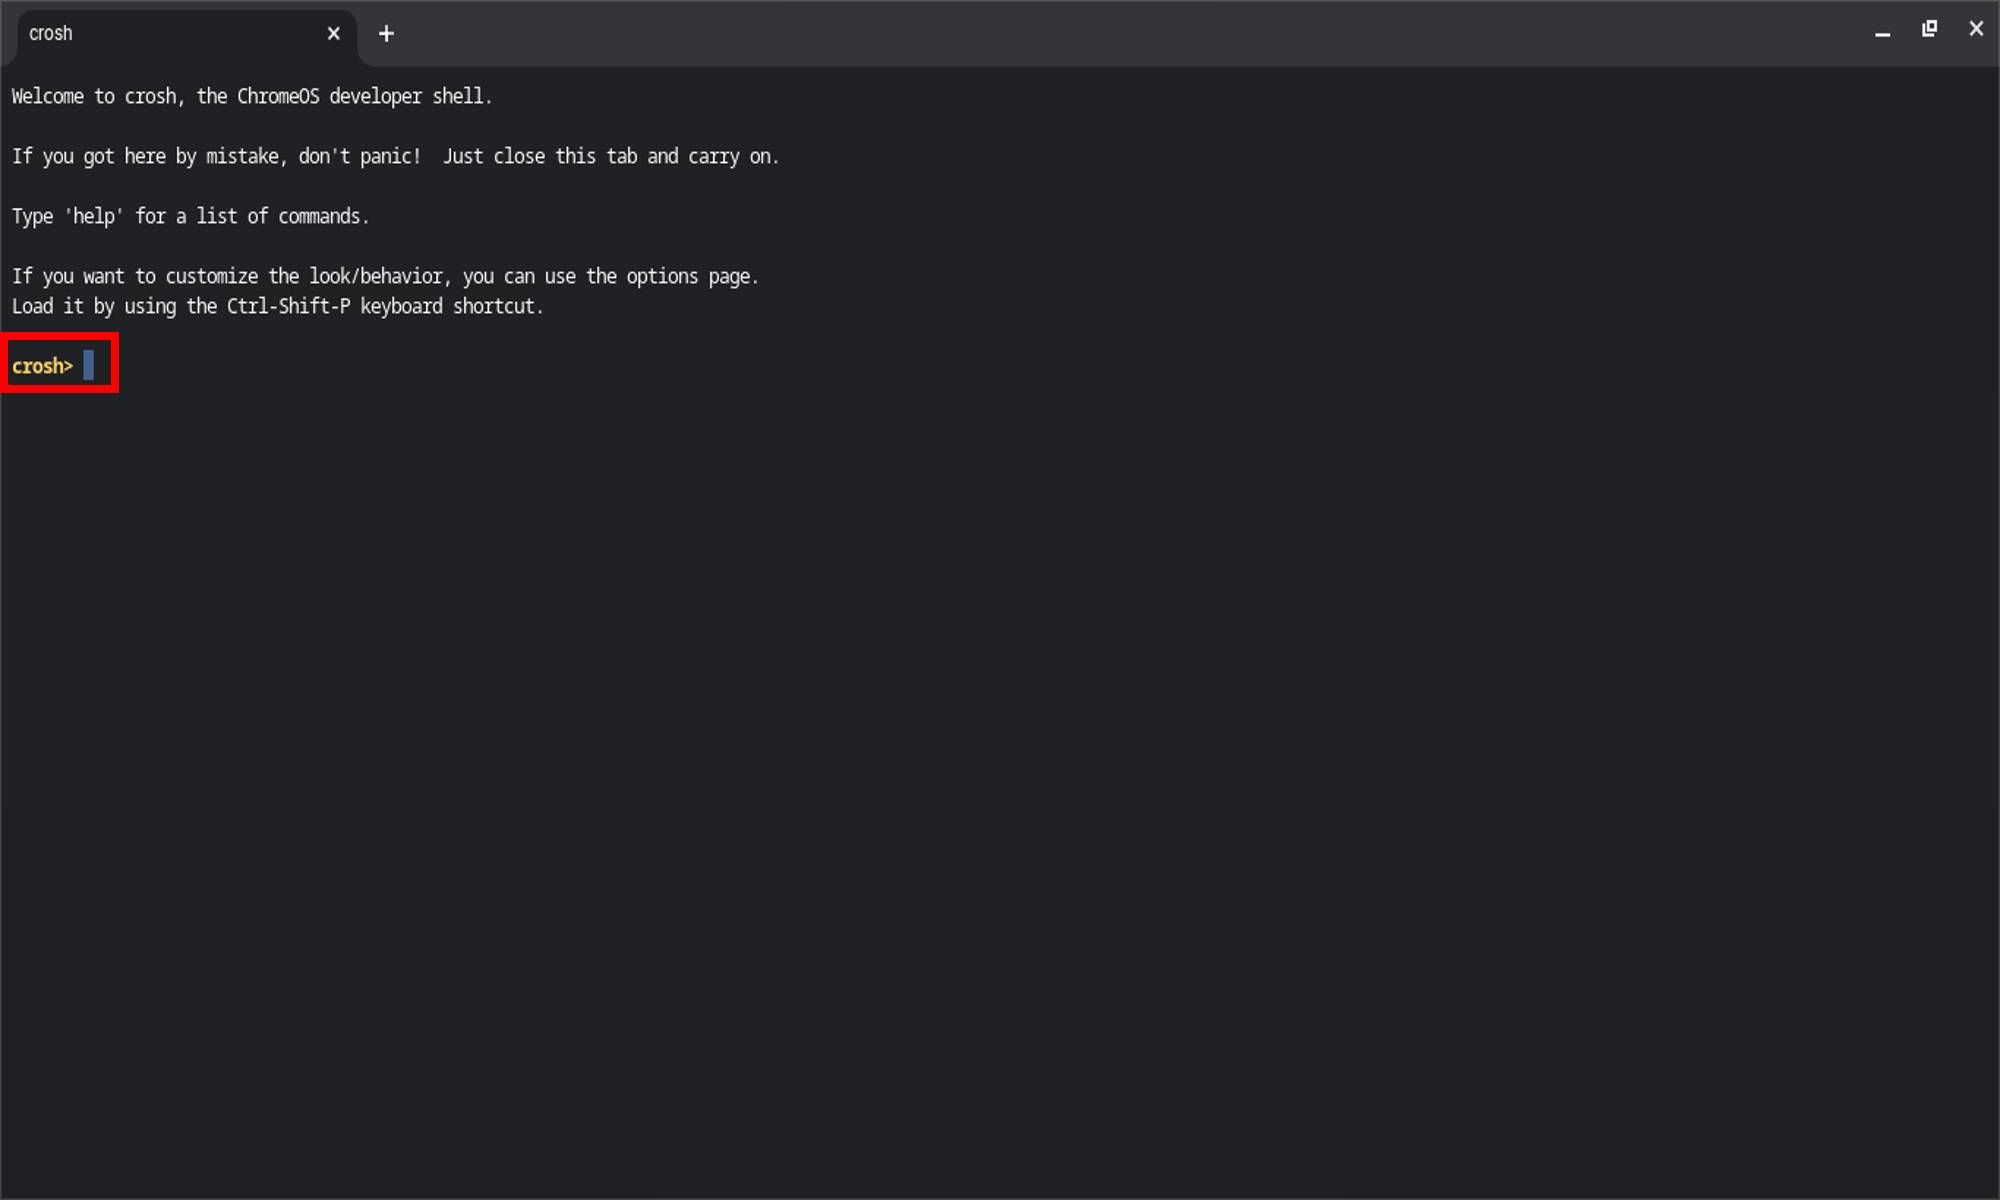
- Type a command next to this cursor and press Enter to run it.


Customize the Crosh terminal
Your Chromebook allows you to customize your Crosh terminal, from visual tweaks to functional edits. Press Ctrl + Shift + P to find the customization options. The page color can be changed to one of eight presets or a fully customized color. The terminal text can be altered, with options for personalizing the font type, size, and color. Line spacing can also be altered, in addition to the in-app cursor.
This menu also allows you to edit general keyboard commands for your Chroembook, as well as mouse and cut-and-paste options. It’s fun to mess around with if the pure black terminal feels a little intimidating.

Cancel processes with the Terminate Crosh Command
This command cancels other command processes that are currently running in Crosh. Some terminal commands run perpetually until told to stop, so having a way to stop them is useful, especially if you don’t want to switch to different tabs. Press Ctrl + C to terminate a running process you no longer require.

Copy and paste text
Given that the default cut command has been designated as the Terminate Crosh command option, the standard copy-and-paste commands don’t work in the Crosh terminal. Instead, press Ctrl + Shift + C to copy text or Ctrl + Shift + V to paste text. You must also press the Shift key when copying and pasting text, codes, or commands within Crosh.
Don’t use these commands outside the Crosh terminal. These copy-and-paste commands don’t act the same elsewhere on your Chromebook.

Run a device diagnosis
The evtest command allows you to select an input device currently connected to your ChromeOS system and run a touch diagnosis, which can assess problems or faults with your Chromebook’s standard hardware and devices like mice or headphones. It’s perfect for running a welcome home health check for your shiny new hardware.

Discover Bluetooth issues
The bt_console command tests the Bluetooth features on your Chromebook. Crosh runs a debug test on your device’s Bluetooth capabilities and resolves any issues it can in the process. If you frequently use wireless hardware, running this test might be a good idea before making your next purchase.

Display the ChromeOS Task Manager
Entering top brings up your Chromebook’s Task Manager and displays your ChromeOS’ process number, battery strain, package affiliation, and other information about your laptop’s inner workings. It isn’t as dynamic as the generic Chromebook Task Manager or Terminal. Still, it’s a great way to glance at your laptop’s stats in a different tab while running tests in Crosh.

Check memory stats and health
The memory_test command checks your Chromebook’s memory stats, with Crosh bringing up the latest and most updated information. The process goes through your files and alerts you to errors it finds. This helps you conduct a last-minute check of your device’s health before something important.

Perform a real-time Ping diagnostic
Run a ping test to test your internet connection. It calculates the speed by which your Chromebook can reach a website using your internet connection. Enter the ping Crosh command to display a running record of connectivity data between your device and your chosen website, indicating irregularities, faults, and dropped packets.

View battery health
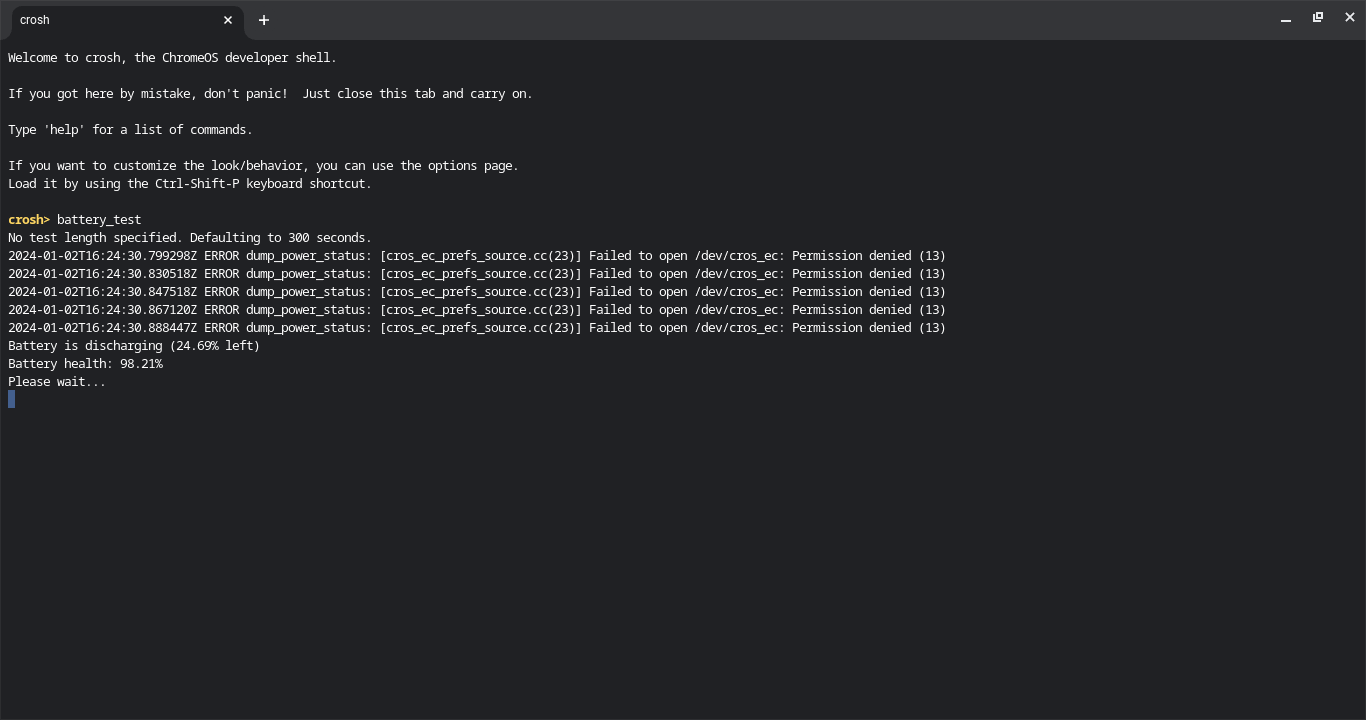
The battery_test command allows for an extensive diagnostic test for assessing your laptop’s battery health. Enter the command plus the amount of time you want the test to run. If you enter the command as is, the length of the test defaults to 300 seconds. This details your battery’s health percentage and charging (or discharging) status.
Display more battery stats
The additional battery information (battery_firmware info) command reveals more details about your Chromebook’s battery, such as its serial number, cycle count, output voltage, and design capacity. This is handy for a brief and detailed check of your battery stats.

Receive help on how Crosh works
The help command provides starting information for unfamiliar users. You are shown the commands for help (as shown above), help_advanced (discussed below), ping test instructions, and how to access Crosh Task Manager (top). This is a good place to start when getting your feet wet with Crosh.

Get additional help
The help_advanced command provides additional help with an extensive list of terminal commands and processes. This command goes into further detail with the processes it describes in help and new commands that can be reviewed and tested in a different tab. We recommend looking at this list, as it provides information on how Crosh functions and how to exploit the app to its potential.

Become a Crosh expert on your Chromebook
While the Task Manager and Terminal apps provide more extensive options for controlling your Chromebook, Crosh commands offer a quick and easy method for running basic tests and acquiring important situational information. Crosh is ideal for people who prefer open source apps, as well as developers and other advanced users. If you’re new to ChromeOS, you may want to wait to use Crosh until you’re familiar with the operating system. Our Chromebook set-up guide can help you get started and learn how to deal with minor issues.
Source link

