
Each morning began with a flood of emails, which included work messages, transport notifications, and random newsletters.
My inbox all the time felt like a large number, whether or not I used to be checking emails on my telephone throughout breakfast or on my desktop PC throughout work.
I attempted labeling programs, starring pressing messages, and setting apart time blocks for e mail. But, I by no means felt fairly on prime of my inbox, even on my most organized days.
My inbox had develop into a supply of fixed low-grade stress till I discovered a tiny Gmail tweak that modified all the things. I turned on Auto-advance. This easy adjustment made an enormous distinction to my workflow.
How my outdated e mail routine appeared
The pile of messages was affecting my focus

I used to suppose I used to be managing my e mail simply positive with labels and stars. I even tried to restrict my e mail checking to twice a day. Nevertheless, it’s robust to comply with while you’re ready for an essential message.
What wore me down wasn’t the variety of emails, however the countless back-and-forth grind of checking a message and going again to my inbox. I’d learn an e mail, reply to it, after which click on Again to inbox. Then I’d determine which one to open subsequent.
Which may sound positive at first. However multiply that routine by 30, 50, or 100 emails, and also you begin to see the issue.
Each time I returned to the inbox, it took an additional click on to pick the subsequent message. I’d find yourself bouncing between unread emails, skipping something that appeared like an excessive amount of effort.
Turning on Auto-advance modified all the things
Managing my inbox felt snappier
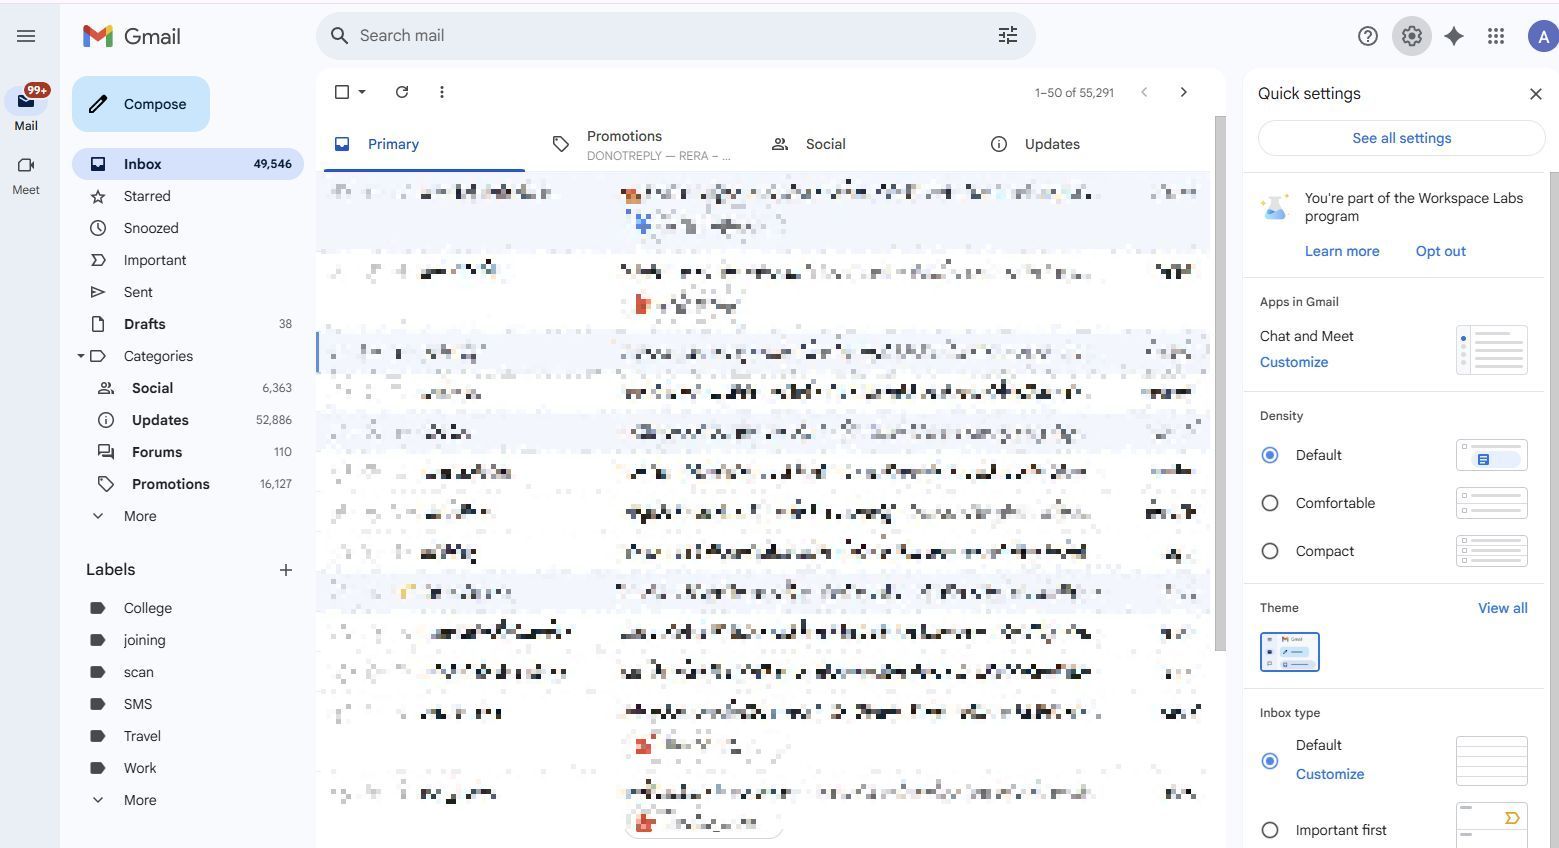
Someday, buried in Gmail’s settings, I seen an choice known as Auto-advance. Once you flip it on, Gmail mechanically takes you to the subsequent e mail after you delete, archive, transfer, or mute a dialog.
Right here’s flip it on:
- Open Gmail in a browser and sign up to your account.
- Click on the gear icon on the prime.
-
Click on See all settings.
- Go to the Superior tab.
-
Beneath the Auto-advance part, choose Allow.
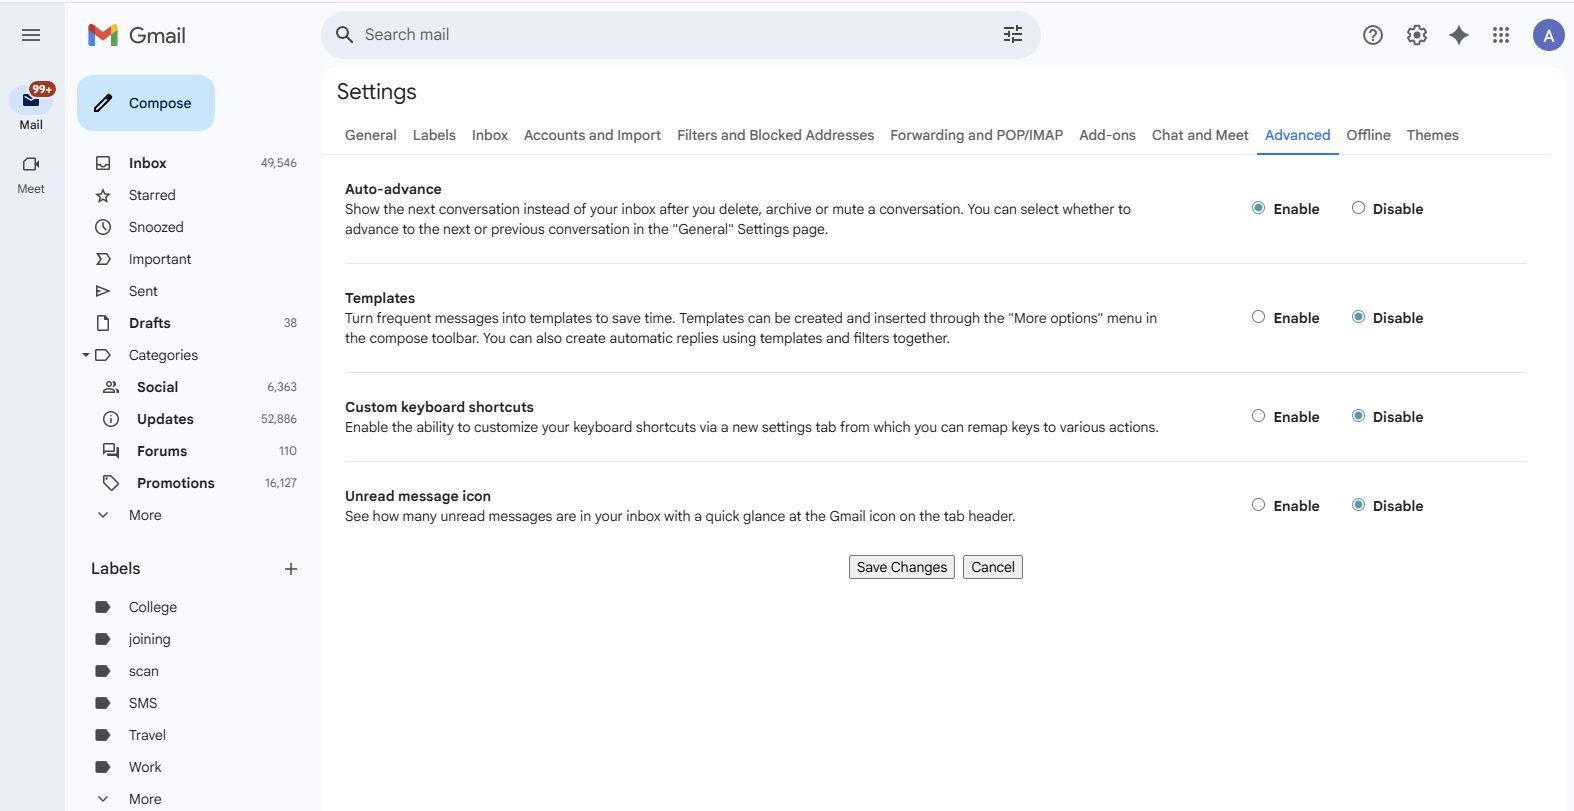
- Click on Save Adjustments.
- Go to the Common tab beneath Settings.
-
Scroll all the way down to Auto-advance, and select whether or not you need to go to the subsequent or earlier dialog.
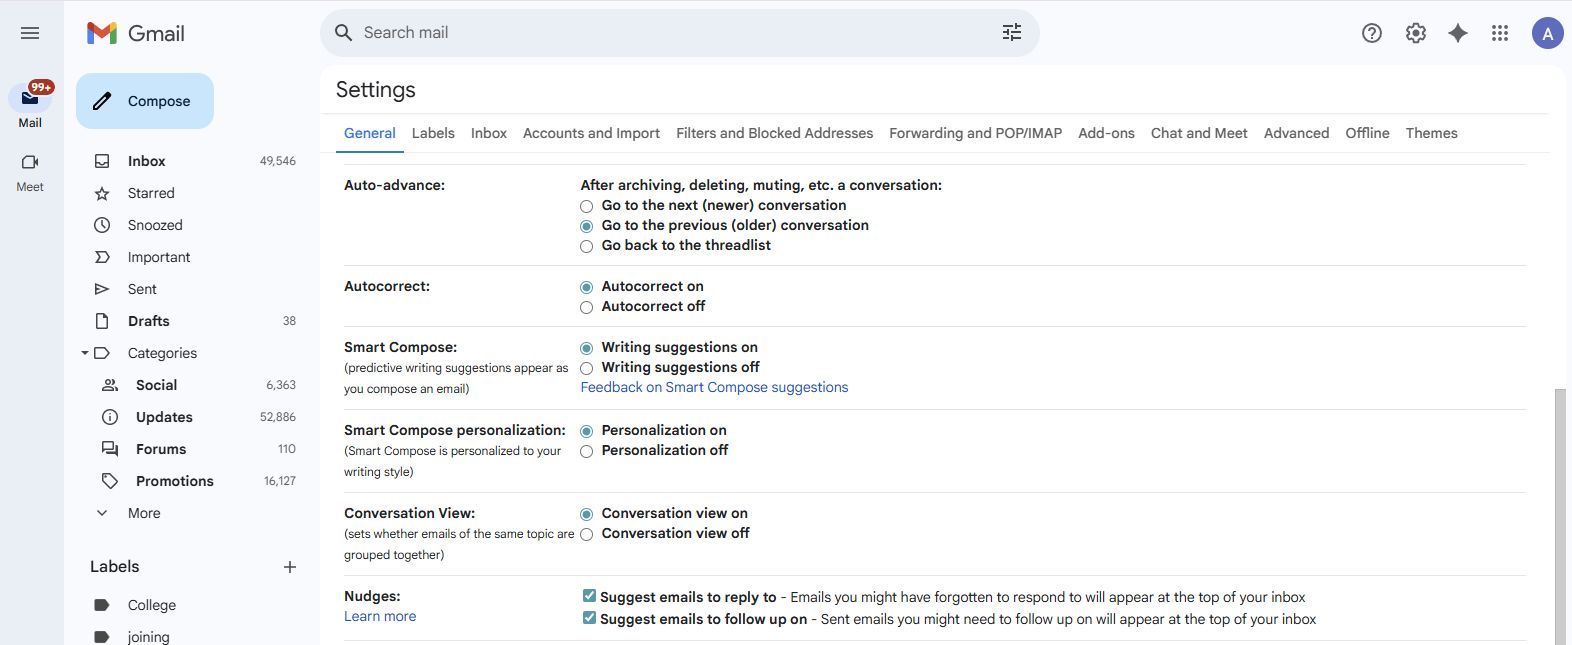
- Click on Save Adjustments.


On cellular, you possibly can navigate to Settings > Common settings > Auto-advance. Choose Newer or Older.
Why Auto-advance works so properly
Processing my inbox one message at a time stored me centered

Auto-advance turns your inbox right into a centered, no-distraction activity listing.
Now I’m going by messages one after the other, decide in seconds (whether or not to archive, delete, or transfer), and Gmail retains serving up the subsequent message. The system ensured I didn’t skip difficult messages.
In a means, it turned Gmail into one thing like a activity supervisor. Every message will get dealt with instantly. If it wants extra time, I snooze it to revisit it later.
I seen just a few advantages virtually immediately. I course of twice as many emails in half the time. I don’t waste power selecting what to learn subsequent, and I’m extra centered since I’m not distracted by topic traces or unread messages.
Bonus: Just a few tweaks that made it even higher
Auto-advance is highly effective by itself, however pairing it with just a few different Gmail options makes the inbox system even smoother.
Keyboard shortcuts

I turned on Gmail’s keyboard shortcuts, and it saved me a couple of minutes every single day. Listed here are the shortcuts I exploit:
- e to archive.
- # to delete.
- r to answer.
- Shift + u to mark as unread.
You’ll be able to activate shortcuts beneath Settings > See all settings > Common > Keyboard shortcuts and choose Keyboard shortcuts on. Click on Save adjustments. Press the query key (Shift + slash) to view the keyboard shortcuts.
Snooze for later
If an e mail requires motion however not instantly, I snooze it for the subsequent day or week. It retains my inbox clear with out shedding observe of issues.
Use labels solely when wanted
I’ve created labels like Comply with-up, Ready, and Learn Later to type messages as I’m going. Nevertheless, I preserve my labels easy and use them solely when a message belongs to a long-term folder. In any other case, I archive it and transfer on to the subsequent.
Unsubscribe as I’m going
With Auto-advance serving to me undergo emails, I ended skipping over newsletters and advertising emails I didn’t learn. I began unsubscribing on the spot, which led to fewer distractions and fewer muddle.
Small tweaks can assist tidy up a messy inbox
In case you’re feeling overwhelmed by a pile of unread messages, I extremely suggest making an attempt Auto-advance for every week.
It’s not a magic resolution for a messy inbox, nevertheless it is among the handiest tweaks I’ve made. The most effective half is that you simply don’t want to put in an extension or be taught a brand new instrument.
My inbox workflow turned drastically sooner and fewer overwhelming after I switched on Auto-advance.